AI Prompt Manager
Plugin Documentation
Hello there...
Thank you for purchasing my plugin. If you have any questions that are beyond the scope of this help file, please feel free to contact me via Support page. Thanks so much!
By: Dannci & Themnific | Support*
* Please note, that plugin support does not include:- Customization and installation services
- Support for third party software and plug-ins
Plugin Overview
AI Prompt Manager turns WordPress into a library of AI prompts. You write prompts once, with {{variables}} in them, and your visitors (or your team) filter the library, fill in the blanks and copy a ready-to-use prompt in one click.
Private and team prompts can live next to public ones. Only the prompts you mark as Public are ever shown to visitors.
Main features:
- Prompts with variables:
{{topic}},{{audience}}… become form fields (text, textarea or dropdown). - Three outputs: Text, Image and Code prompts, each with its own extra fields (tone, aspect ratio, language…).
- Instructions: reusable blocks of text (a persona, client facts, house rules) included in many prompts. Edit once, every prompt changes.
- Tool variants (optional): different text per AI tool, e.g. Midjourney parameters.
- Visibility: Private (only me), Team or Public, with a dedicated Prompt Member role.
- Front end: prompt library with search, filters and live suggestions, a Fill & copy form on every prompt and an optional Ctrl/⌘+K command palette.
- Display anywhere: Prompt Library block,
[apm_prompts]shortcode and four widgets (also usable in Elementor). - Result images for image prompts, with protection for non-public prompts.
- Works with block themes (templates editable in the Site Editor) and classic themes.
Requirements:
- WordPress 6.7 or newer,
- PHP 8.0 or newer.
The plugin is theme-agnostic and ships with minimal styling: layout comes from the plugin, colors and fonts come from your theme. Screenshots in this documentation were taken with the default Twenty Twenty-Five (block) and Twenty Twenty-One (classic) themes, so the front end of your site will look different with your own theme.
Plugin Installation
Installation via WP Dashboard:
- Unzip/extract the main (downloaded) package – to get
ai-prompt-manager-1.6.0.zip(orai-prompt-manager.zip) file, - Go to Plugins > Add New Plugin,
- click on “Upload Plugin”,
- click on ‘Browse’ button, find the plugin zip file on your computer and press 'Install Now',
- Activate the plugin,
- a new Prompts menu appears in the dashboard.

Installation via FTP:
- Unzip/extract the plugin zip file to get the plugin folder ‘ai-prompt-manager’,
- Using FTP client (e.g. FileZilla) upload '
ai-prompt-manager' folder into 'plugins' folder in your WordPress installation (YOUR_HOSTING_ROOT/YOUR_SUBDIRECTORY/wp-content/plugins/), - Go to Plugins, find AI Prompt Manager and activate it.
What happens on activation:
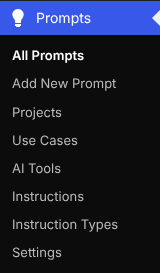
- The Prompts menu is added (with Projects, Use Cases, AI Tools, Instructions, Instruction Types and Settings):
- Administrators and Editors get the rights to manage prompts, and a new user role Prompt Member is created (see Visibility & Roles),
- three starter Instruction Types are created: Persona, Context and Rules (you can rename or delete them),
- a small database table (
{prefix}apm_usage) and a daily WP-Cron job are created for usage statistics, - a protected folder
wp-content/uploads/apm-protected/is created for images of non-public prompts.
The prompt library lives at yoursite.com/prompts/. If that URL shows a 404 error after activation, go to Settings » Permalinks and just hit Save Changes (this refreshes WordPress rewrite rules).
Updating from an older version:
Upload the new version over the old one (Plugins > Add New Plugin > Upload Plugin > Replace current with uploaded). Data migrations run automatically the next time an administrator opens the dashboard. Your prompts are kept.
Quick Start
Your first public prompt in a few minutes:
- Go to Prompts > Add New Prompt.
- Enter a title, e.g. “Blog post outline”.
- Write the prompt text and put the parts people should change in double curly braces:
Write a detailed outline for a blog post about {{topic}}. The reader is {{audience}}. Aim for {{length}}. - In the Prompt settings box (right side) choose the Output (Text, Image or Code) and set Visibility to Public.
- Optionally add a short description in the Excerpt box – it is shown on cards and under the title.
- Hit Publish and click View Prompt. Your visitors can now fill in topic, audience and length and copy the finished prompt.
The whole library is at yoursite.com/prompts/. Add it to your menu in Appearance > Menus (custom link) or in the Site Editor navigation.
Settings
Go to Prompts > Settings (Administrators only):
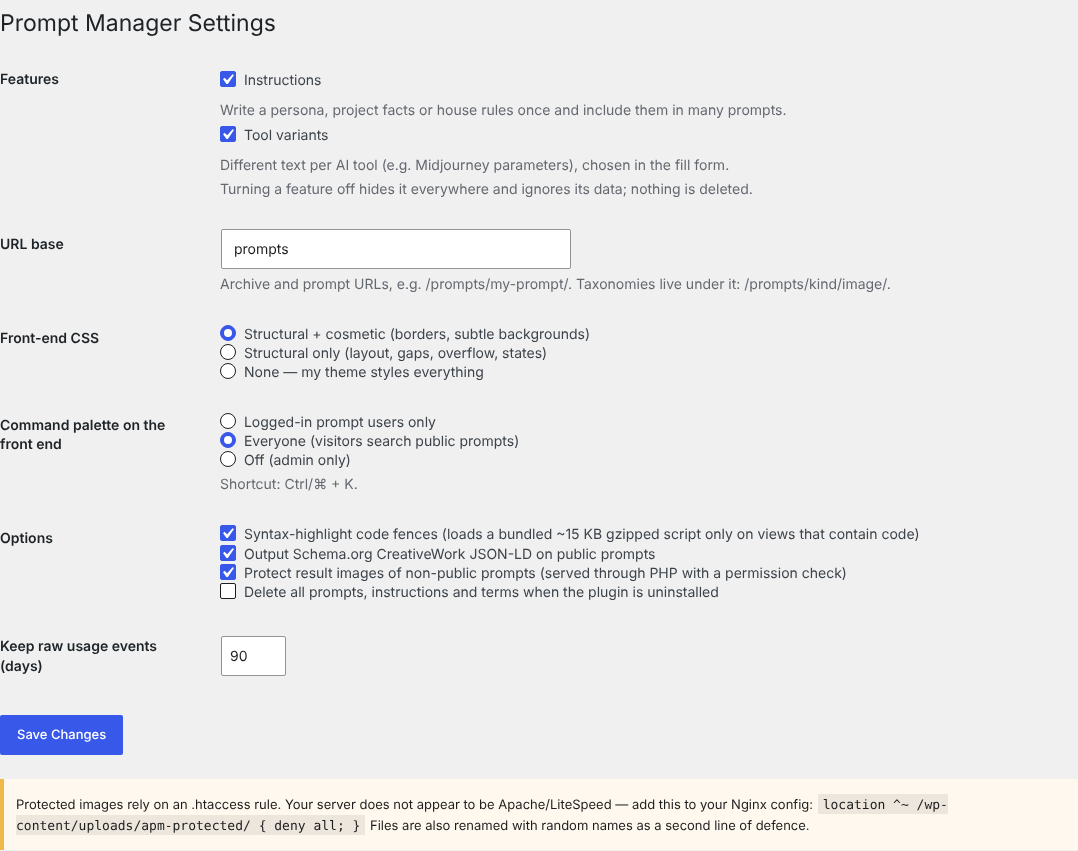
| Setting | What it does | Default |
|---|---|---|
| Features: Instructions | Reusable text blocks (persona, context, rules) included in prompts. See Instructions. | On |
| Features: Tool variants | Different text per AI tool, chosen in the fill form. See Tool Variants. | Off |
| URL base | The slug of the library and of every prompt URL, e.g. /prompts/my-prompt/. Projects, use cases, tools and outputs live under it: /prompts/project/…, /prompts/task/…, /prompts/tool/…, /prompts/kind/…. | prompts |
| Front-end CSS | Structural + cosmetic, Structural only or None. See Styling. | Structural + cosmetic |
| Command palette on the front end | Logged-in prompt users only, Everyone (visitors search public prompts) or Off. In wp-admin the palette is always available to prompt editors. | Off |
| Syntax-highlight code fences | Loads a bundled highlighter (Prism, about 15 KB gzipped) only on pages that contain a ``` code block. | Off |
| Schema.org JSON-LD | Adds CreativeWork structured data to public prompts. | On |
| Protect result images | Images of non-public prompts are moved to a protected folder. See Result Images. | On |
| Delete all … on uninstall | Removes all prompts, instructions and terms when you delete the plugin. See Uninstall. | Off |
| Keep raw usage events (days) | How long single copy events are kept (7–3650). The totals are kept permanently. | 90 |
Turning a feature off hides it everywhere and ignores its data, but nothing is deleted. Switch it back on and your instructions or tool variants are there again.
Changing the URL base refreshes permalinks automatically. Old URLs stop working, so set it before you share links.
If you are finished click on "Save Changes" button!
Creating Prompts
Go to Prompts > Add New Prompt. The edit screen uses a plain-text editor (not Gutenberg), so the prompt is stored exactly as you type it.
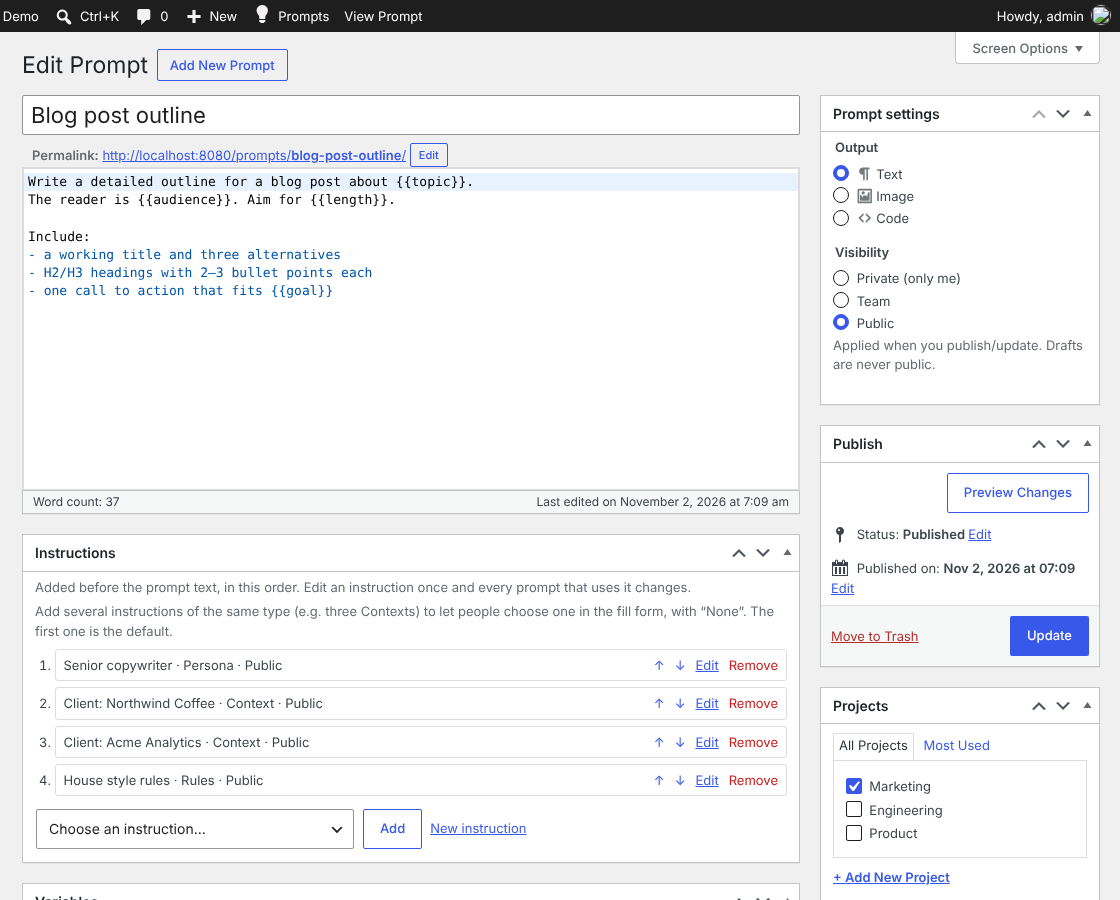
The edit screen has these sections:
- Title and prompt text,
- Prompt settings (right): Output and Visibility,
- Instructions (if the feature is on),
- Variables,
- Output fields,
- Tool variants (if the feature is on; collapsed by default),
- Quality & testing (collapsed by default),
- Excerpt (used as the description), Projects, Use Cases and AI Tools.
If a box is missing, open Screen Options at the top of the screen and enable it.
Prompt Text & Description
- Write the prompt in the main editor. Line breaks and blank lines are kept.
- Mark every part people should change as a variable:
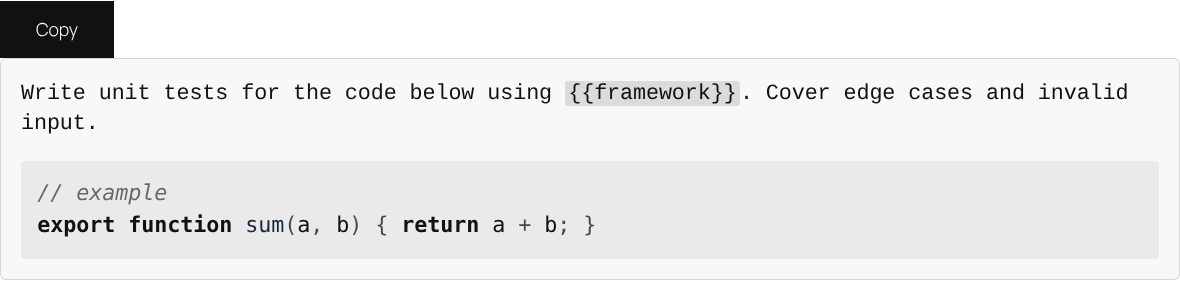
{{topic}}. Names use lowercase letters, numbers and underscores and start with a letter (e.g.{{target_audience}}). - Code can be added as a fenced block. It is shown as code on the front end (and highlighted if syntax highlighting is on):
```js
export function sum(a, b) { return a + b; }
```
- Write a one-sentence description in the Excerpt box. It appears under the title, on cards and in search suggestions:
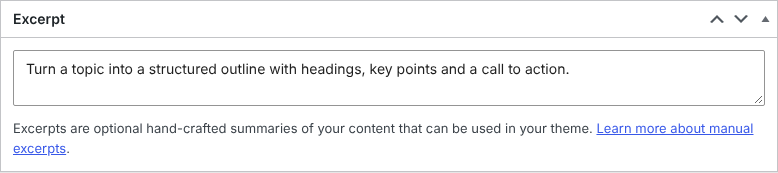
Prompt text is always shown as plain text. HTML, shortcodes and blocks inside a prompt are displayed, never executed.
Variables
Every {{placeholder}} in the prompt automatically becomes a text field in the fill form. Declare a variable in the Variables box when you want to give it a nicer label, a default value or a dropdown.
- The box lists all placeholders found in the prompt. Click Add as variable next to a name to declare it:
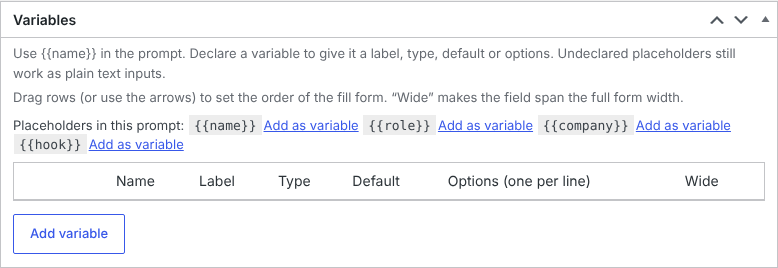
- Fill in the row:
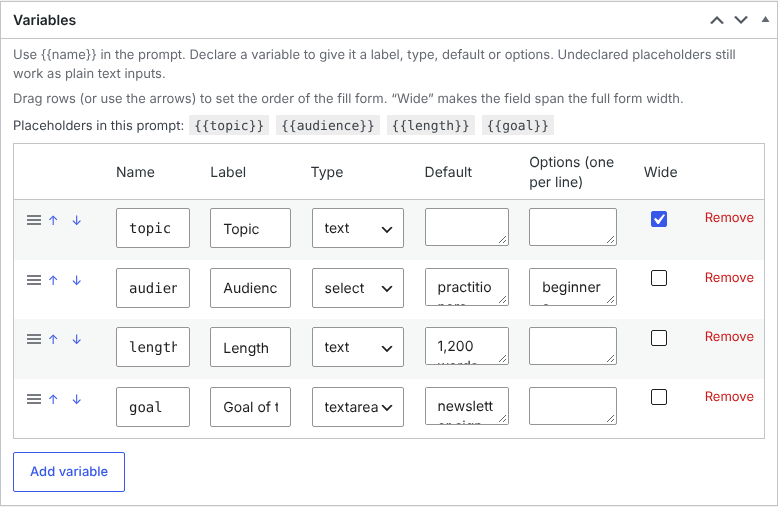
- Name: the placeholder name without braces (
topic), - Label: what visitors see (“Topic”),
- Type:
text(one line),textarea(several lines) orselect(dropdown), - Default: pre-filled value,
- Options: dropdown choices, one per line (for
select), - Wide: the field spans the full width of the fill form.
- Name: the placeholder name without braces (
- Drag rows by the handle (or use ↑ / ↓) to set the order of fields in the fill form.
Limits: up to 50 variables per prompt, up to 50 options per dropdown, names up to 40 characters.
Output & Output Fields
Each prompt has exactly one Output, chosen in the Prompt settings box: Text, Image or Code.
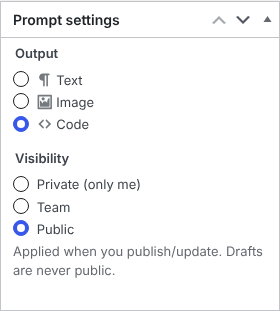
The Output fields box changes with the selected output:
| Output | Fields |
|---|---|
| Text | Tone, Audience, Length, Output format |
| Image | Aspect ratio (1:1, 4:5, 3:2, 2:3, 16:9, 9:16, 21:9), Negative prompt, Style references, Result images |
| Code | Language, Stack, Ask for input code when assembling, Expected output (diff, full file, review list, explanation) |
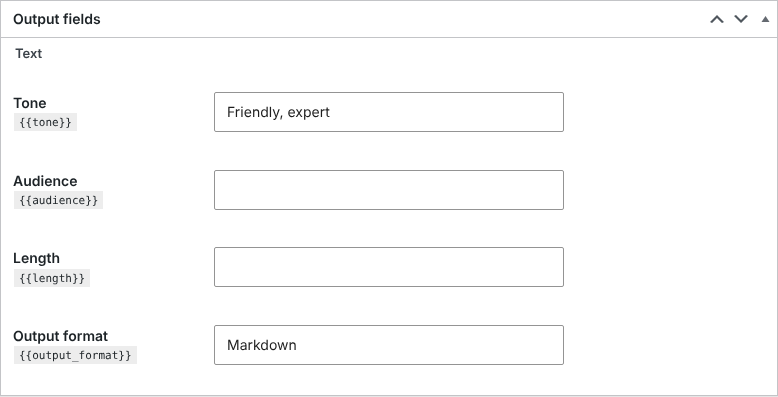
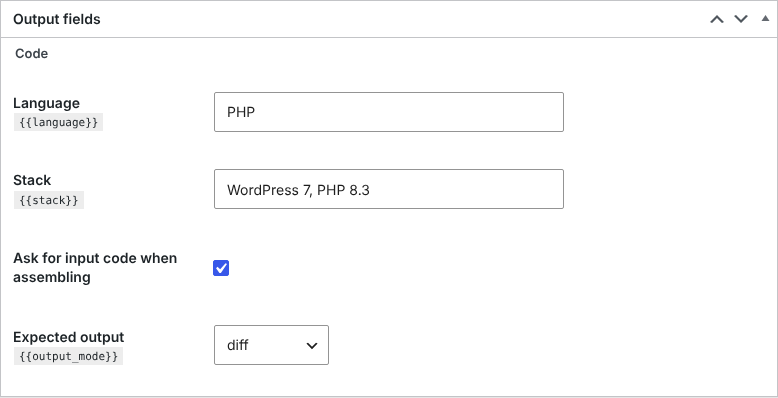
How output fields end up in the copied prompt:
- The fields appear in the fill form, pre-filled with the values you saved. Visitors can change or clear them.
- Each filled field is added after the prompt text as
Label: value, e.g. Tone: Friendly, expert. Empty fields add nothing. - You can also use a field as a placeholder (the code name is shown under each label, e.g.
{{aspect_ratio}}). Then the value is inserted there and not added again at the end. - Code prompts with “Ask for input code when assembling” get an Input code box in the fill form. The pasted code is added at the very end as a fenced code block in the selected language.
Result images of Image prompts are described in Result Images.
Instructions
Instructions are reusable pieces of text – a persona, facts about a client or project, house style rules – that you write once and include in many prompts. Edit an instruction and every prompt that uses it changes.
Instructions can be switched off in Prompts > Settings > Features. Image prompts don't use instructions.
1. Create instructions
- Go to Prompts > Instructions and click Add Instruction:
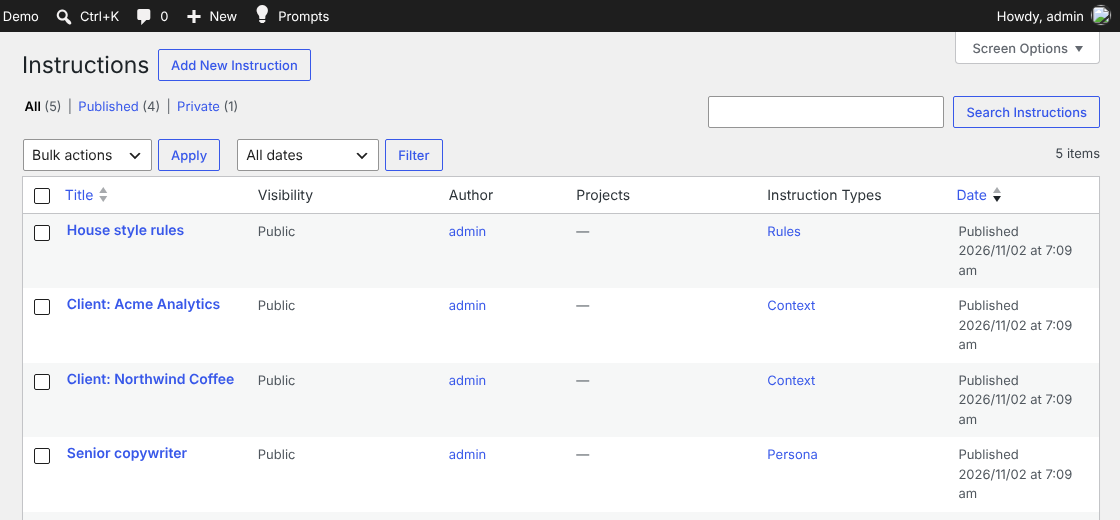
- Enter a name (“Senior copywriter”), the text, choose an Instruction Type and set the Visibility:
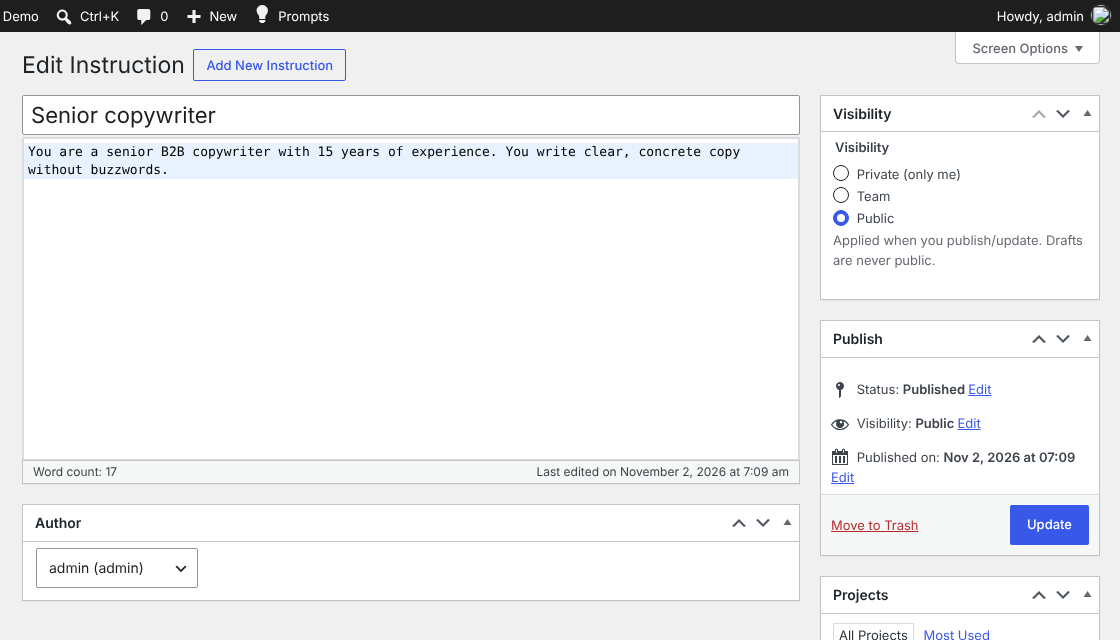
Visitors only ever get Public instructions. Private and Team instructions are never sent to them and their names are not shown. The prompt edit screen warns you when an attached instruction is not public.
2. Instruction Types
Types group instructions (Persona, Context and Rules are created on activation). Manage them in Prompts > Instruction Types:
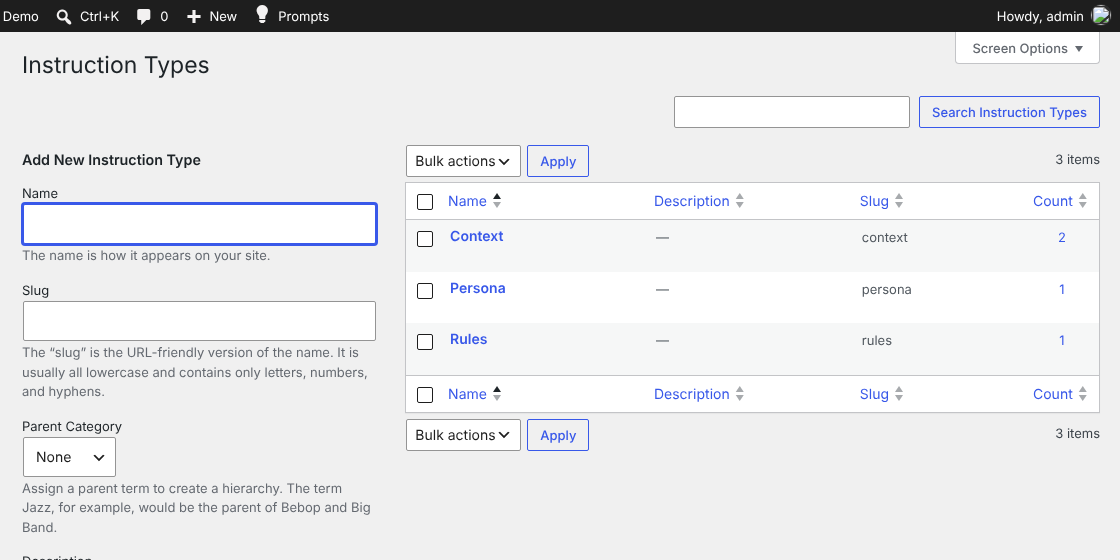
3. Attach instructions to a prompt
- In the prompt's Instructions box choose an instruction and click Add (up to 12 per prompt). Use ↑ / ↓ to set the order:
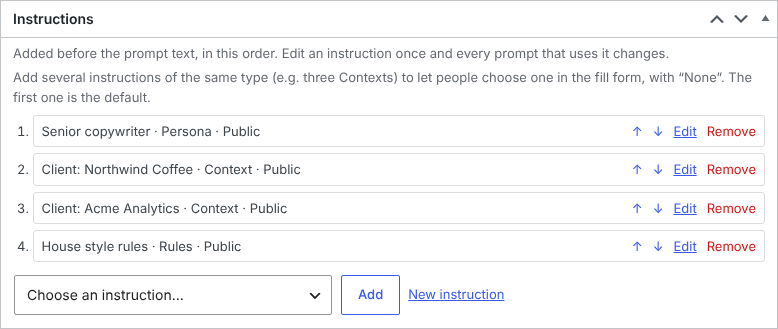
- One instruction of a type is always included.
- Several instructions of the same type become a dropdown in the fill form (“None” + the instructions; the first one is the default). Example above: one Persona and two client Contexts → the persona is always included, visitors pick the client.
- Want two instructions of the same kind always included (e.g. two sets of rules)? Merge them into one instruction or give them different types.
{{variables}}work inside instructions too; the fill form shows fields for them.
The fill form lists what is included besides the visible prompt, e.g. “Also includes: Senior copywriter (Persona)”.
Order of the copied prompt:
Instructions → prompt text (+ tool variant) → output fields → input code.
Tool Variants
Tool variants let one prompt carry extra or different text per AI tool. Typical use: Midjourney parameters.
- Enable Tool variants in Prompts > Settings > Features (off by default).
- Add your tools in Prompts > AI Tools first (e.g. ChatGPT, Claude, Midjourney).
- In the prompt's Tool variants box click Add variant, choose the tool, the mode and the text:
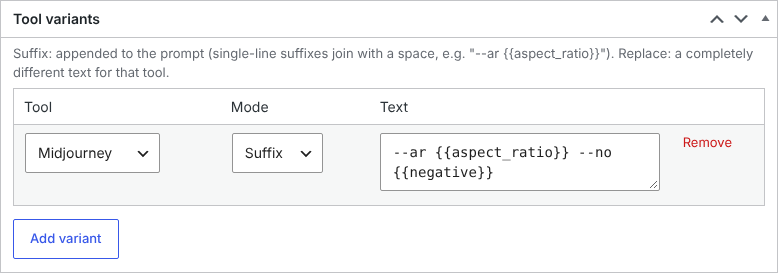
- Suffix: added to the end of the prompt. A one-line suffix is joined with a space (
--ar {{aspect_ratio}} --no {{negative}}), a multi-line suffix becomes its own paragraph. - Replace: a completely different text for that tool.
- Suffix: added to the end of the prompt. A one-line suffix is joined with a space (
- Visitors choose the variant in the Tool variant dropdown of the fill form (default: None).
Up to 20 variants per prompt.
Quality & Testing
Prompts that work today can get worse after a model update. Record what you tested in the Quality & testing box:
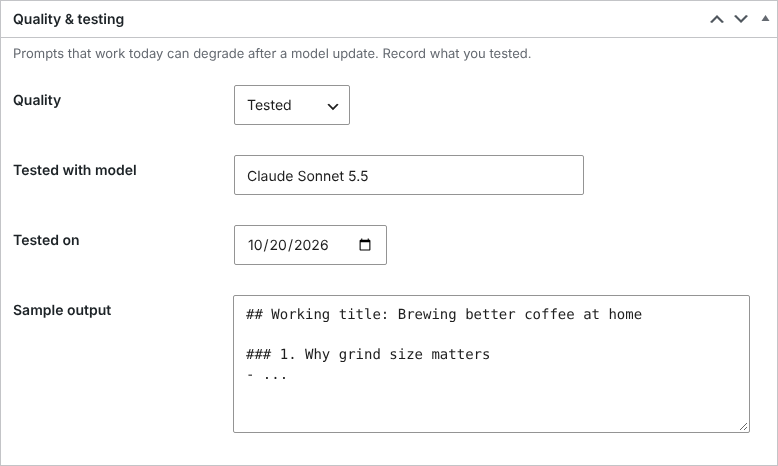
- Quality: Untested, Tested or Deprecated (shown as a badge and in the admin list),
- Tested with model and Tested on: shown as “Tested with … on …” on the prompt page,
- Sample output: shown as a collapsible “Sample output” section on the prompt page.
Projects, Use Cases, AI Tools
Prompts are organised with three category-like taxonomies. All of them are filters in the library and have their own archive pages.
| Taxonomy | Used for | URL |
|---|---|---|
| Projects | Client, product or team. Also available on instructions. | /prompts/project/… |
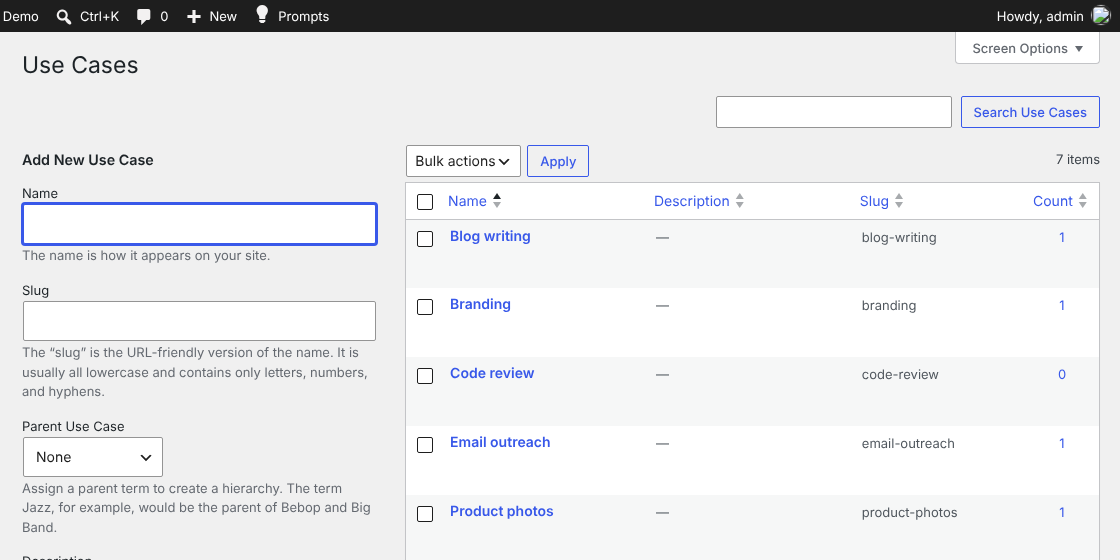
| Use Cases | What the prompt is for (Blog writing, Refactoring…). Several per prompt. | /prompts/task/… |
| AI Tools | ChatGPT, Claude, Midjourney… Required for tool variants. | /prompts/tool/… |
The admin All Prompts list shows Output, Visibility, Quality and Uses for every prompt and can be filtered by output, visibility and project:
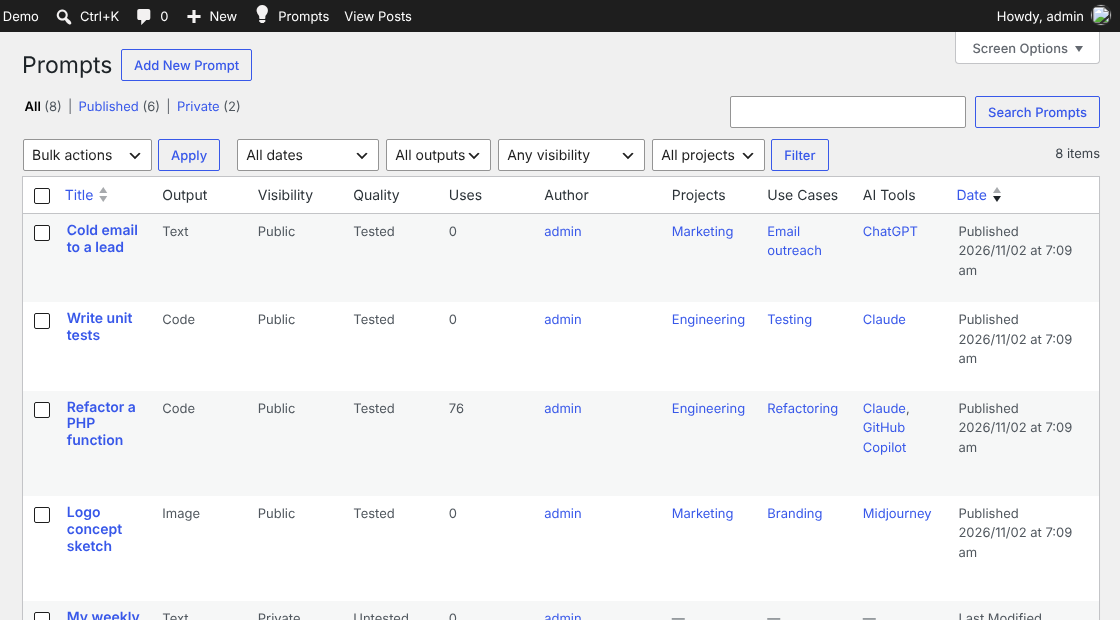
Note: Quick Edit and Bulk Edit are not available for prompts and instructions, because they can't handle the visibility settings. Open the prompt to change it.
Visibility & Roles
Every prompt and instruction has one of three visibility levels, set in the Prompt settings (or Visibility) box:
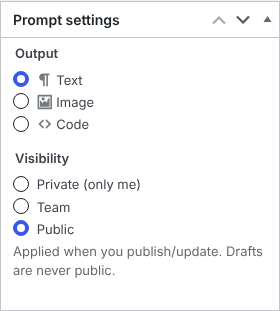
| Visibility | Who can see it |
|---|---|
| Private (only me) | Only the author (and Administrators). |
| Team | Logged-in users who work with prompts (Administrators, Editors, Prompt Members). |
| Public | Everyone, including visitors and search engines. |
- Visibility is applied when you Publish/Update. Drafts are never public.
- Private and Team prompts are hidden from visitors everywhere: library, search, feeds, sitemaps, widgets, the palette and the REST API.
- Non-public prompts get a
noindextag, and pages viewed by logged-in users are sent with no-cache headers so a page cache never stores them. - Prompts created by code or imported without a visibility value are treated as Private.
Who can do what:
| Administrator | Editor | Prompt Member | Other roles | |
|---|---|---|---|---|
| Create prompts and instructions | ✓ | ✓ | ✓ | – |
| See Team prompts | ✓ | ✓ | ✓ | – |
| Edit other people's Team prompts | ✓ | ✓ | – | – |
| Make a prompt Public | ✓ | ✓ | – | – |
| Create Projects, Use Cases, AI Tools, Instruction Types | ✓ | ✓ | – | – |
| See other people's Private prompts | ✓ | – | – | – |
| Change plugin Settings | ✓ | – | – | – |
When a Prompt Member chooses “Public”, the prompt is saved as Team. An Editor or Administrator can then publish it.
Adding a team member:
- Go to Users > Add User,
- select the Prompt Member role:

Front End
Prompt Library & Filters
The library is at yoursite.com/prompts/ (see URL base). It shows 24 prompts per page as cards:
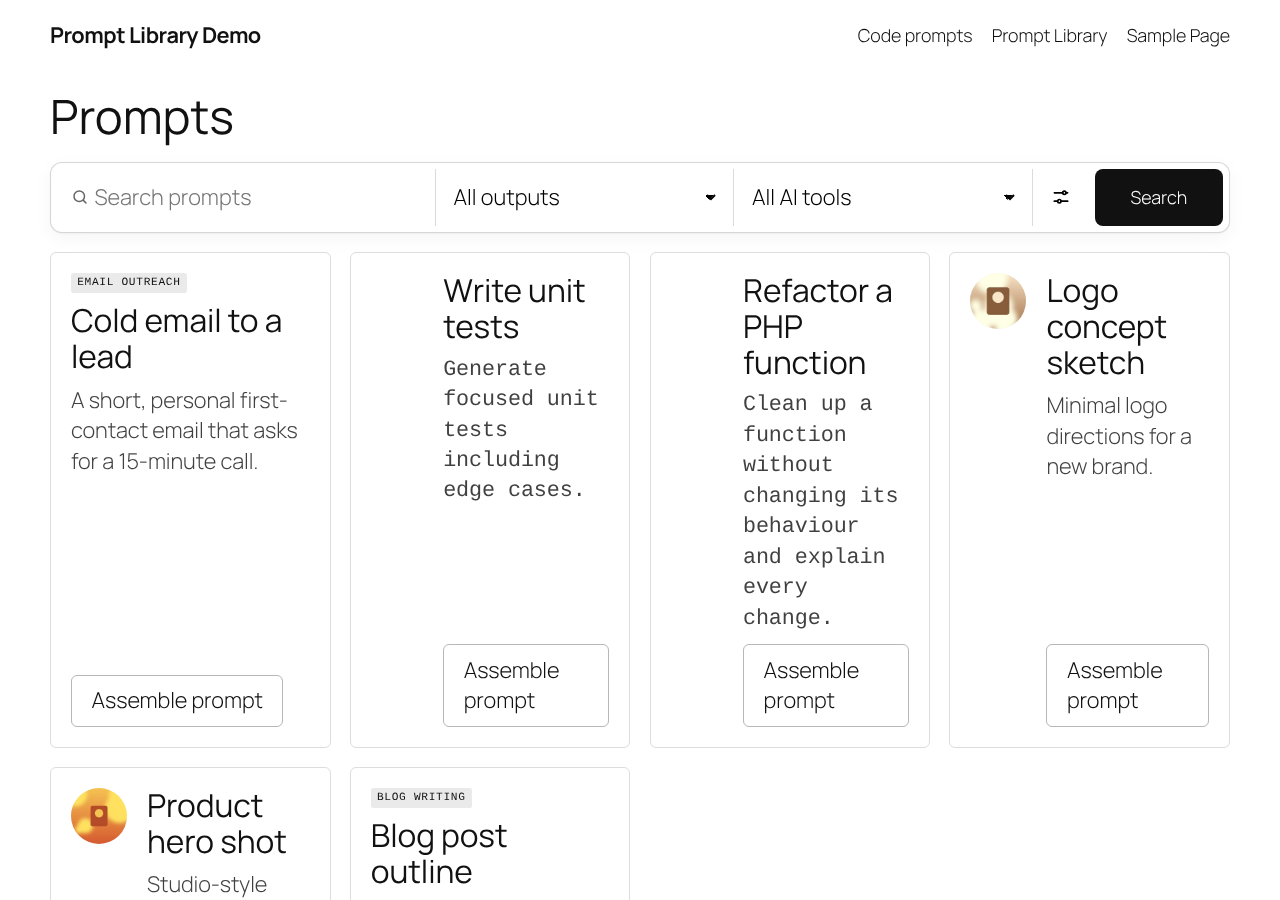
Cards look slightly different per output: Code cards start with a language tile (PHP, JS…), Image cards with a round thumbnail of the first result image, Text cards with the first use case. The “Assemble prompt” button opens the prompt.
Search & filter bar
- Search field, Output and AI tool filters and the Search button:

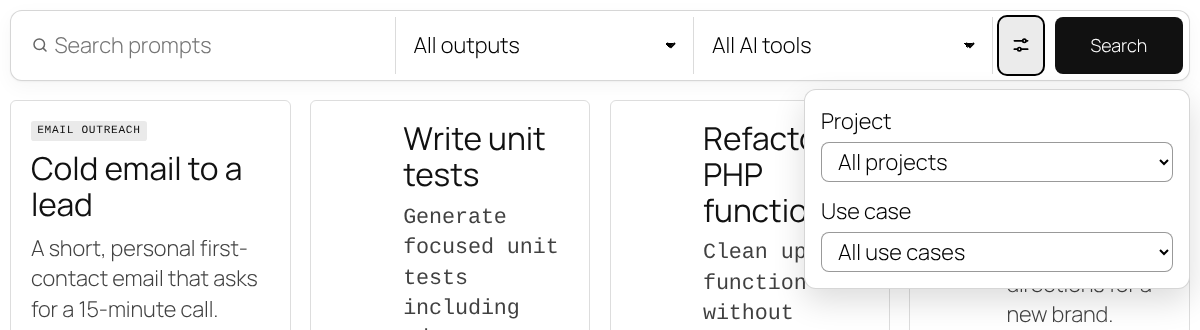
- The filter icon opens More filters (Project, Use case). Esc or a click outside closes it. It also works without JavaScript:
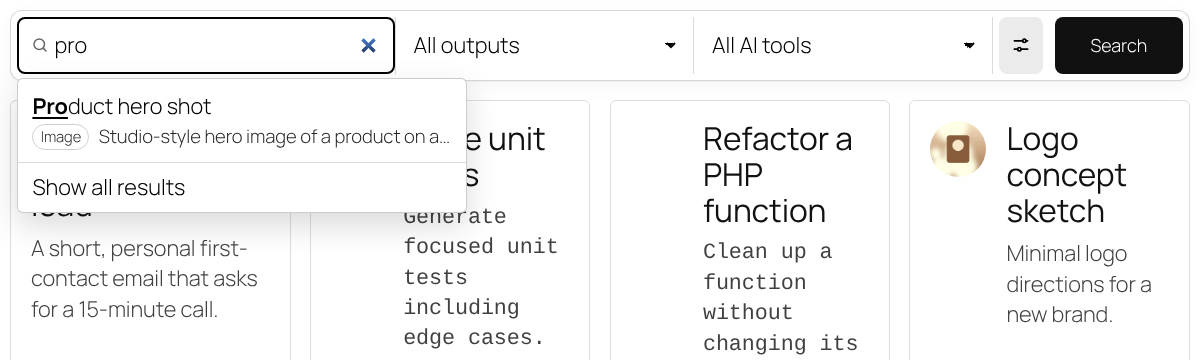
- Live search: after 2 characters, up to 6 matching prompts are suggested while typing. Use ↑ / ↓ to browse, Enter to open, Esc to close:
The bar stacks automatically in narrow areas (sidebars, small Elementor columns). Filtered result pages get a noindex tag, so search engines don't index endless filter combinations.
Fill & Copy
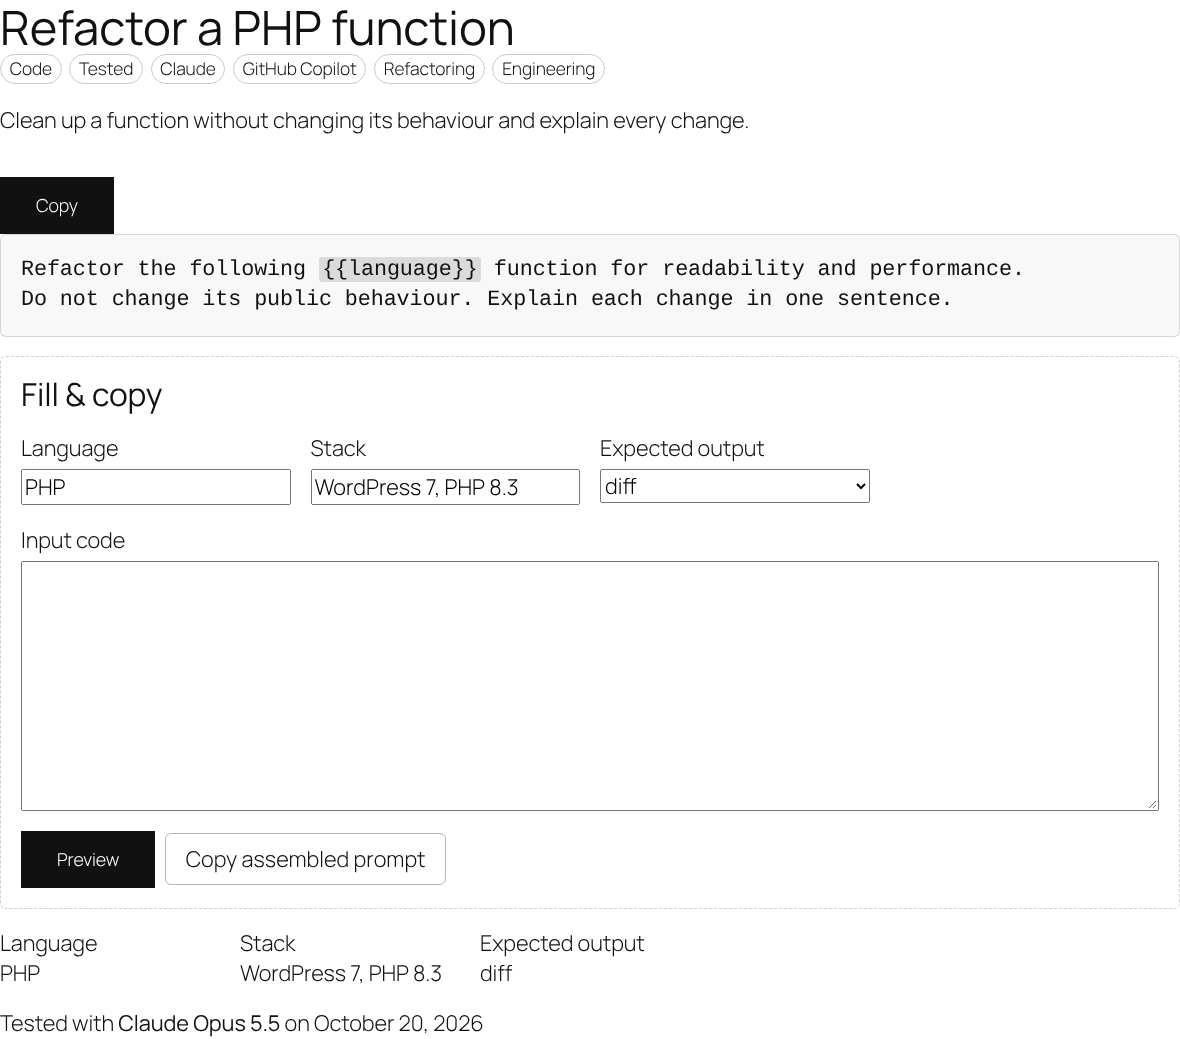
Each prompt page shows the description, badges (output, quality, tools, use cases, project), the prompt text with highlighted {{variables}}, a Copy button and the Fill & copy form:
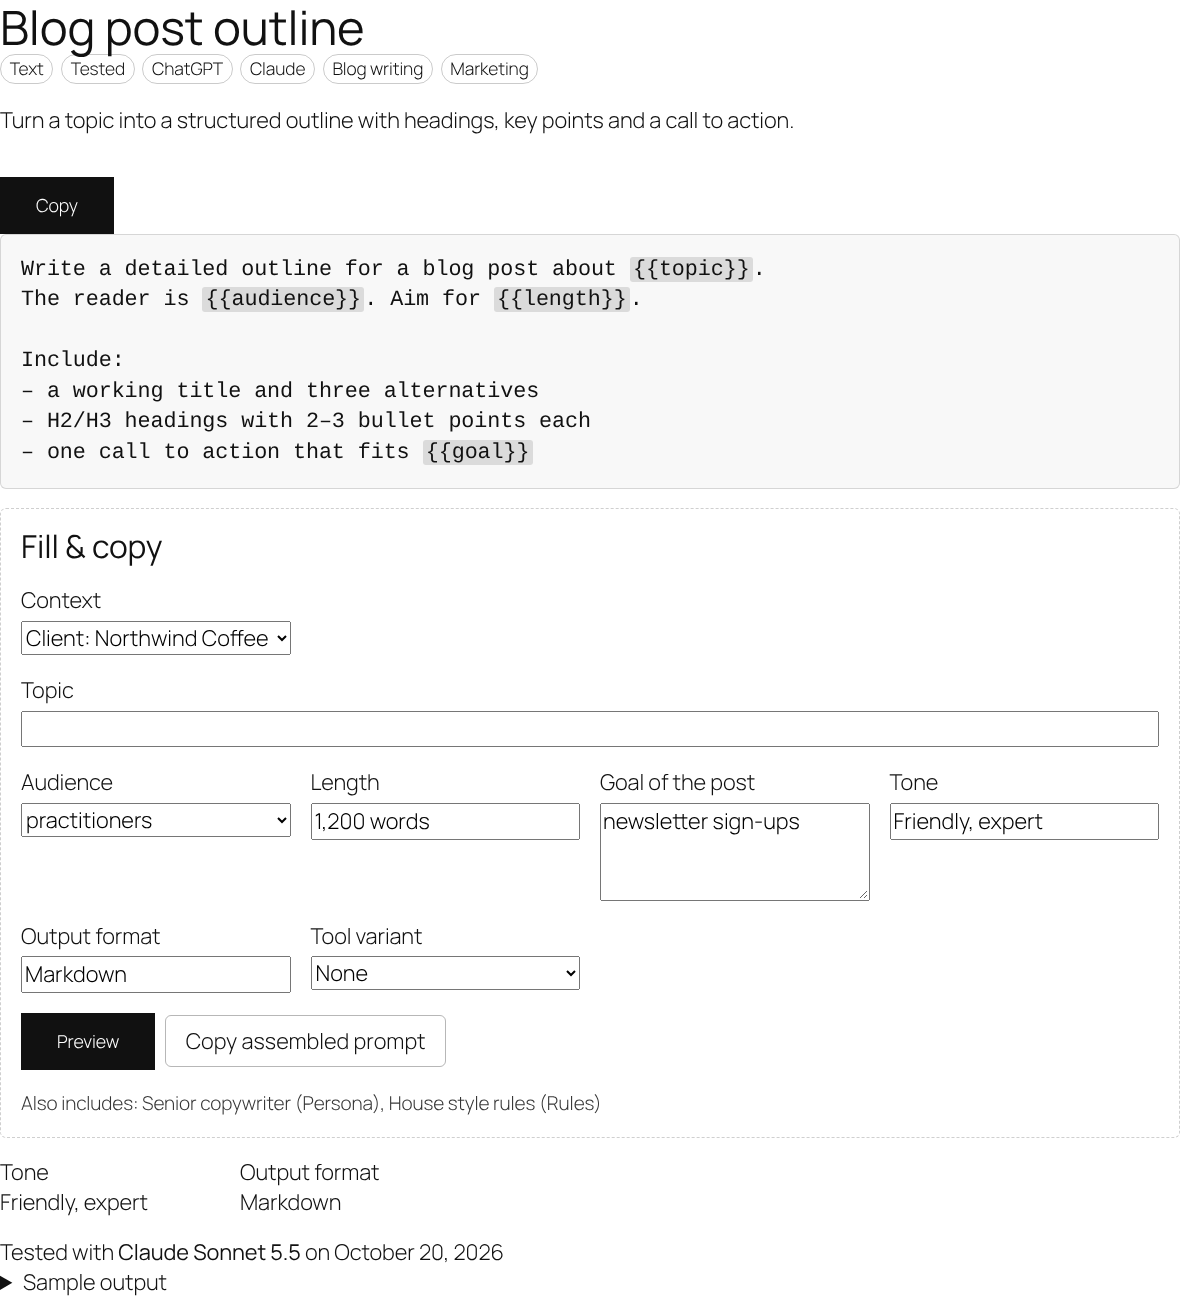
- Copy (next to the prompt) copies the prompt exactly as written, with the placeholders.
- In Fill & copy, visitors fill in the fields, pick an instruction (if there is a choice) and a tool variant.
- Preview (or Enter in a field) shows the assembled prompt. After the first preview it updates while typing.
- Copy assembled prompt copies it in one click without previewing. The preview box also has its own copy icon in the corner.
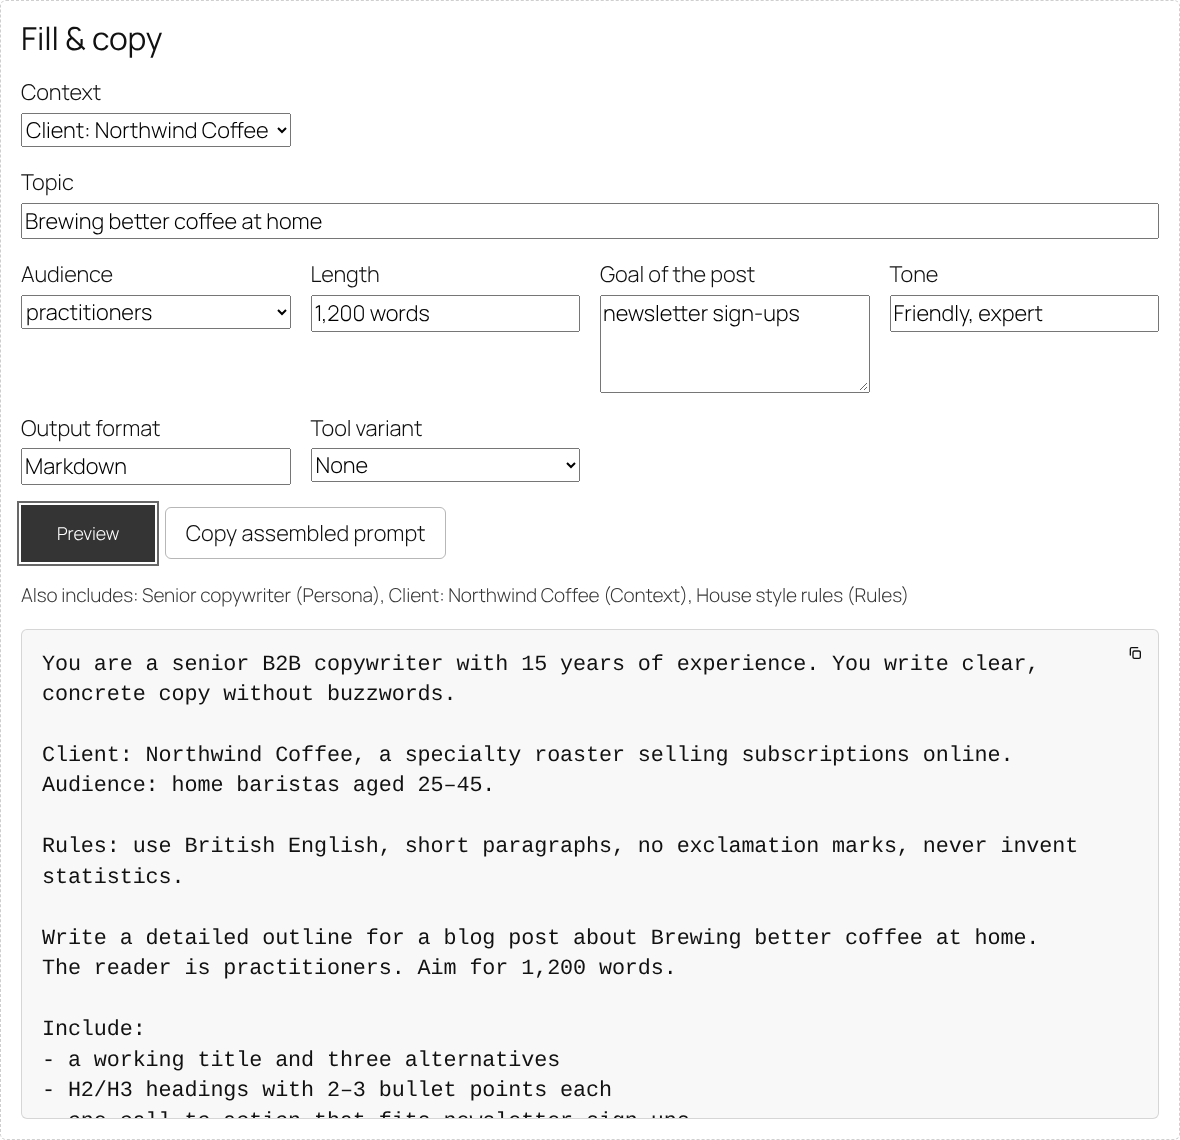
- If a placeholder is left empty, it stays in the text as
{{name}}and the form shows an “Unfilled:” note.
Image prompts show their result images above the prompt; Code prompts with an input slot show the Input code box:
Command Palette
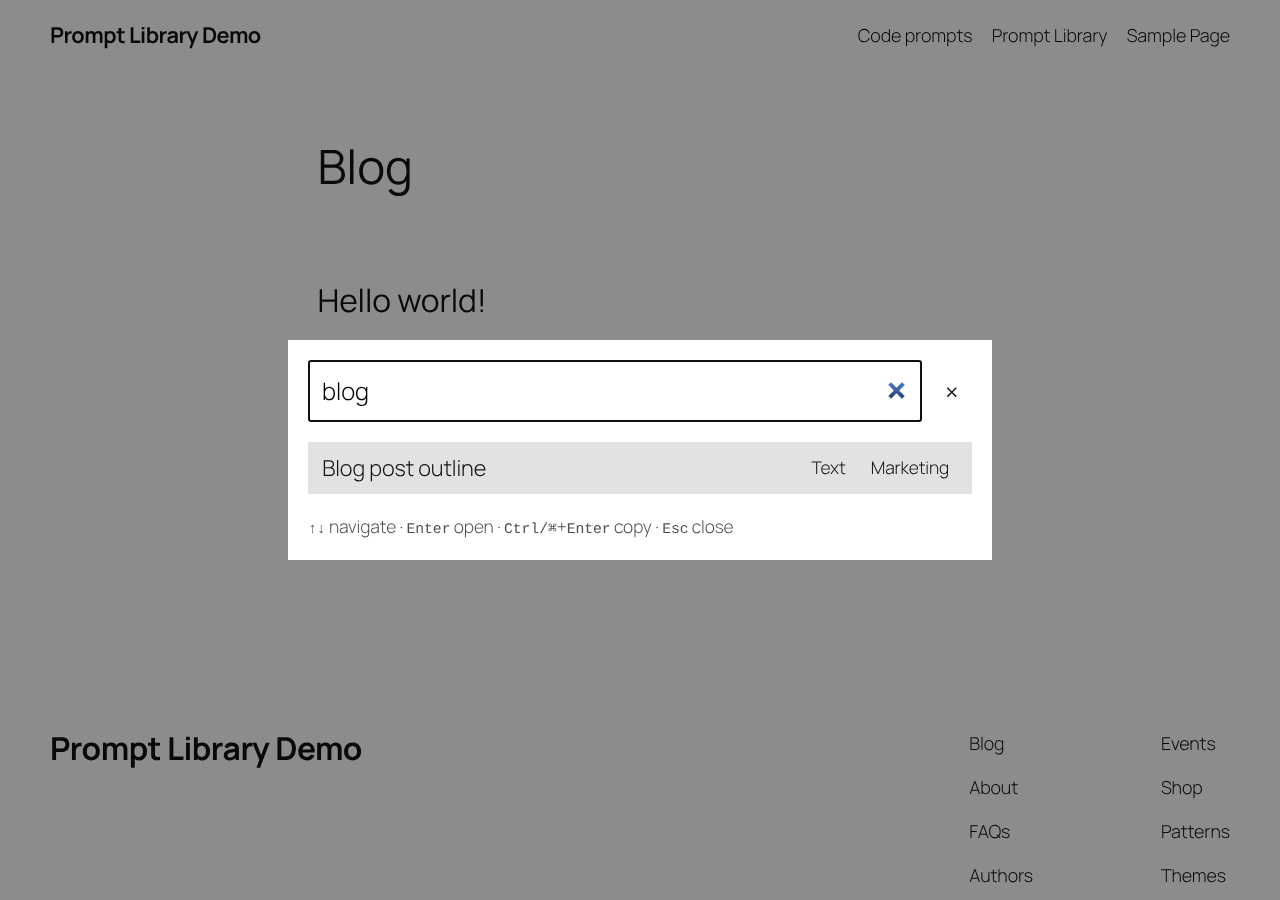
Press Ctrl+K (⌘+K on Mac) to search, fill and copy any prompt without leaving the page.
- Enable it for the front end in Prompts > Settings > Command palette on the front end (Logged-in prompt users only or Everyone). It is off on the front end by default.
- Type to search:
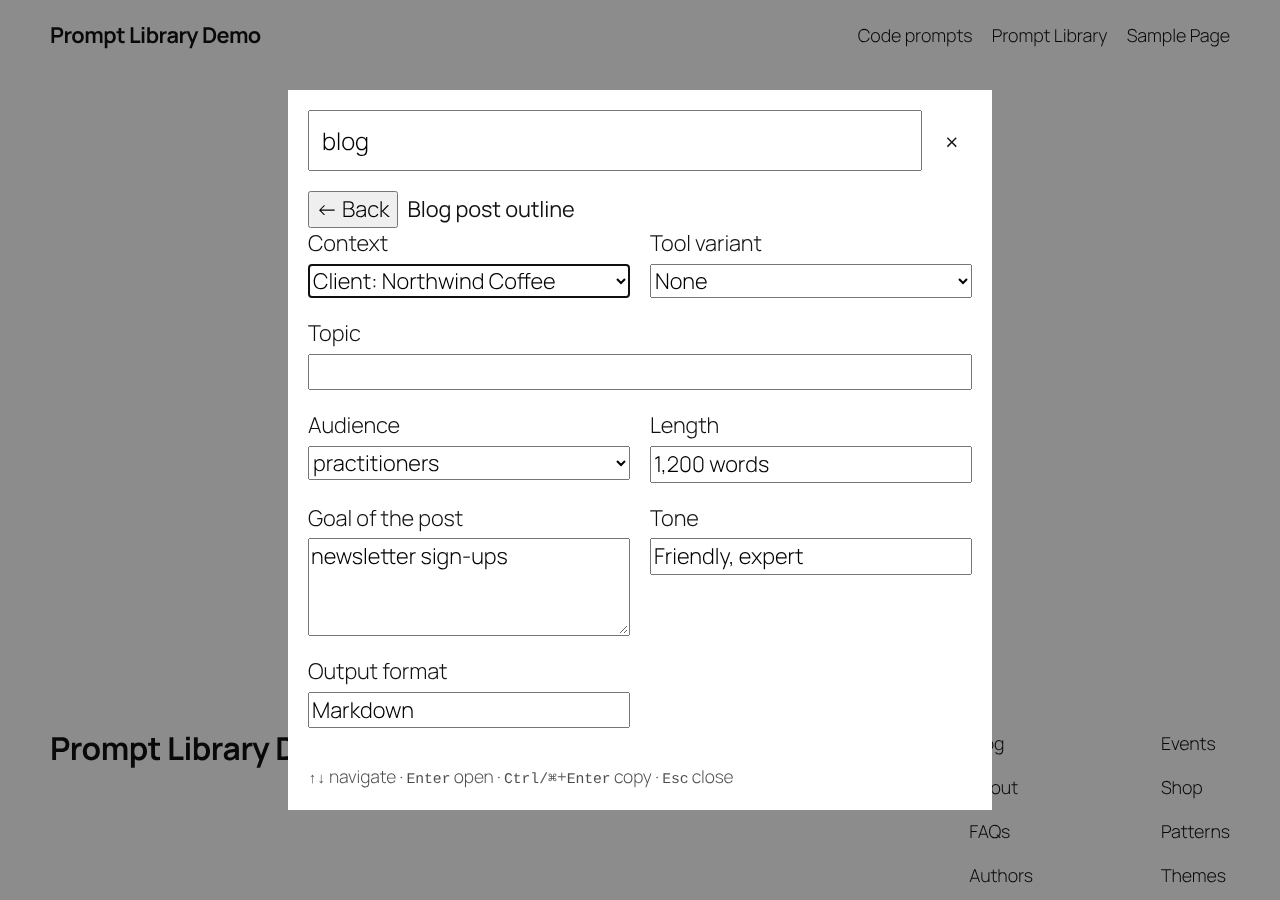
- Enter opens the prompt with its fill form; Ctrl/⌘+Enter copies it with default values:
- Esc closes it (the first Esc clears the search field, the second closes the palette).
Logged-in prompt editors can also open it from the Prompts item in the admin bar. In wp-admin, Ctrl/⌘+K opens WordPress's own command palette; type “Search prompts” there.
Displaying Prompts
Besides the library at /prompts/, you can embed a prompt list on any page or post.
Prompt Library Block
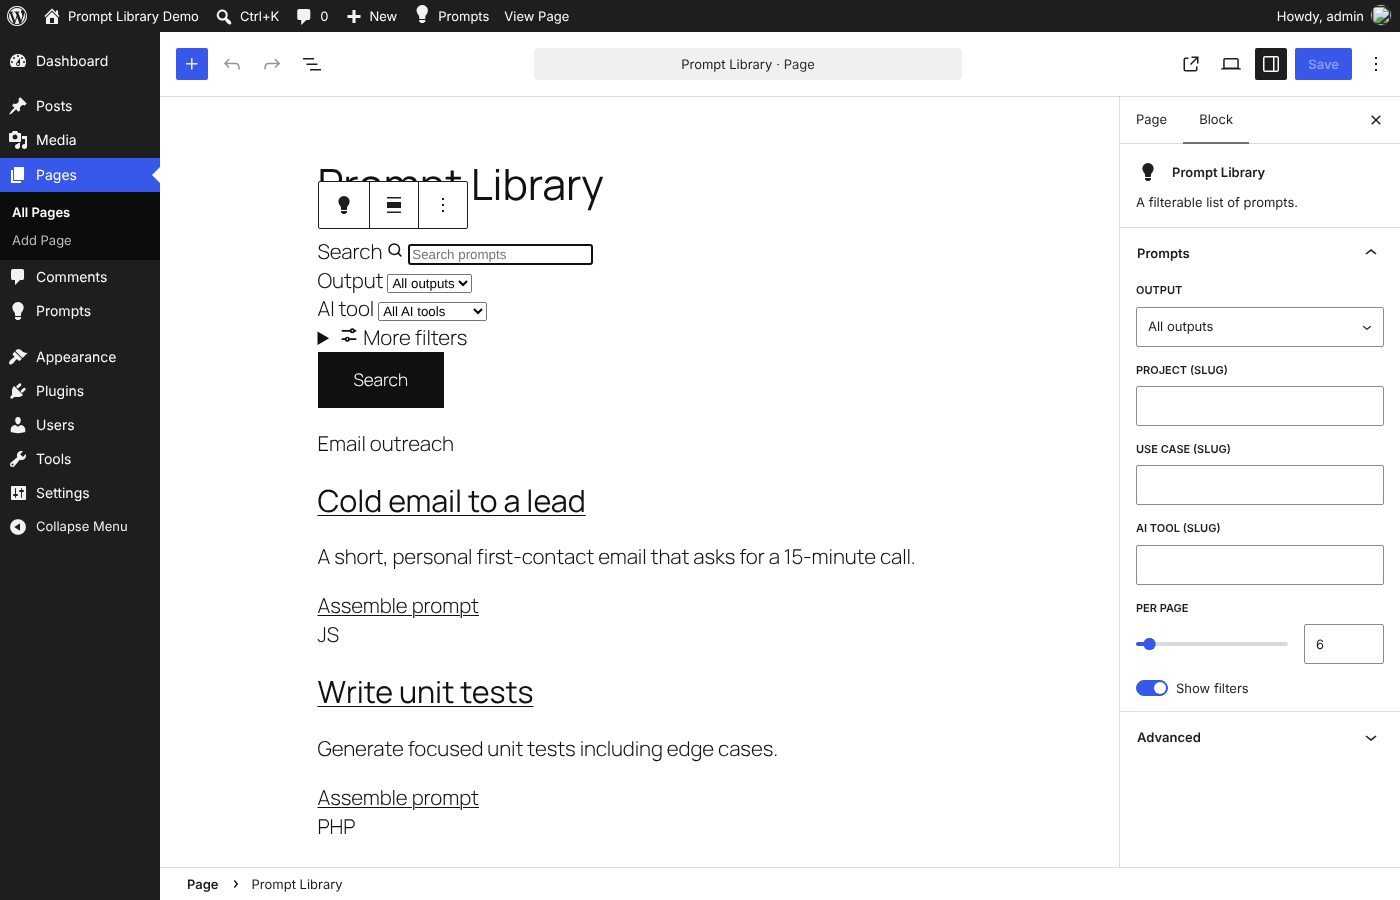
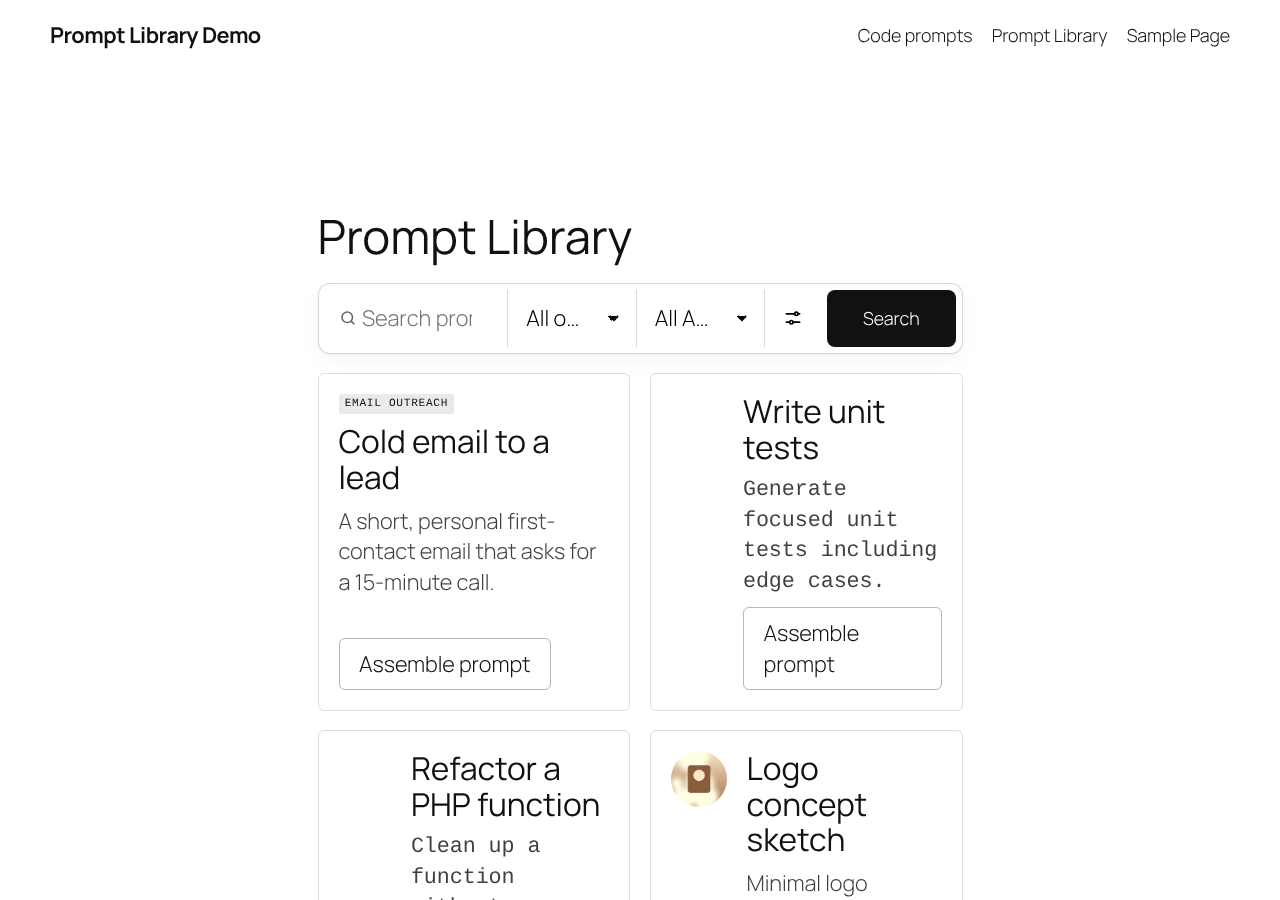
- Edit a page in the block editor and add the Prompt Library block (search for “prompt”).
- In the right Block panel set:
- Output: all or only Text / Image / Code,
- Project (slug), Use case (slug), AI tool (slug): limit the list to one term – enter the term's slug (shown in Prompts > Projects etc.),
- Per page: 1–60 (default 12),
- Show filters: show the search & filter bar above the list.
- Publish the page.
The preview inside the block editor is not styled. On the live page the list uses the full plugin styling:
Shortcode
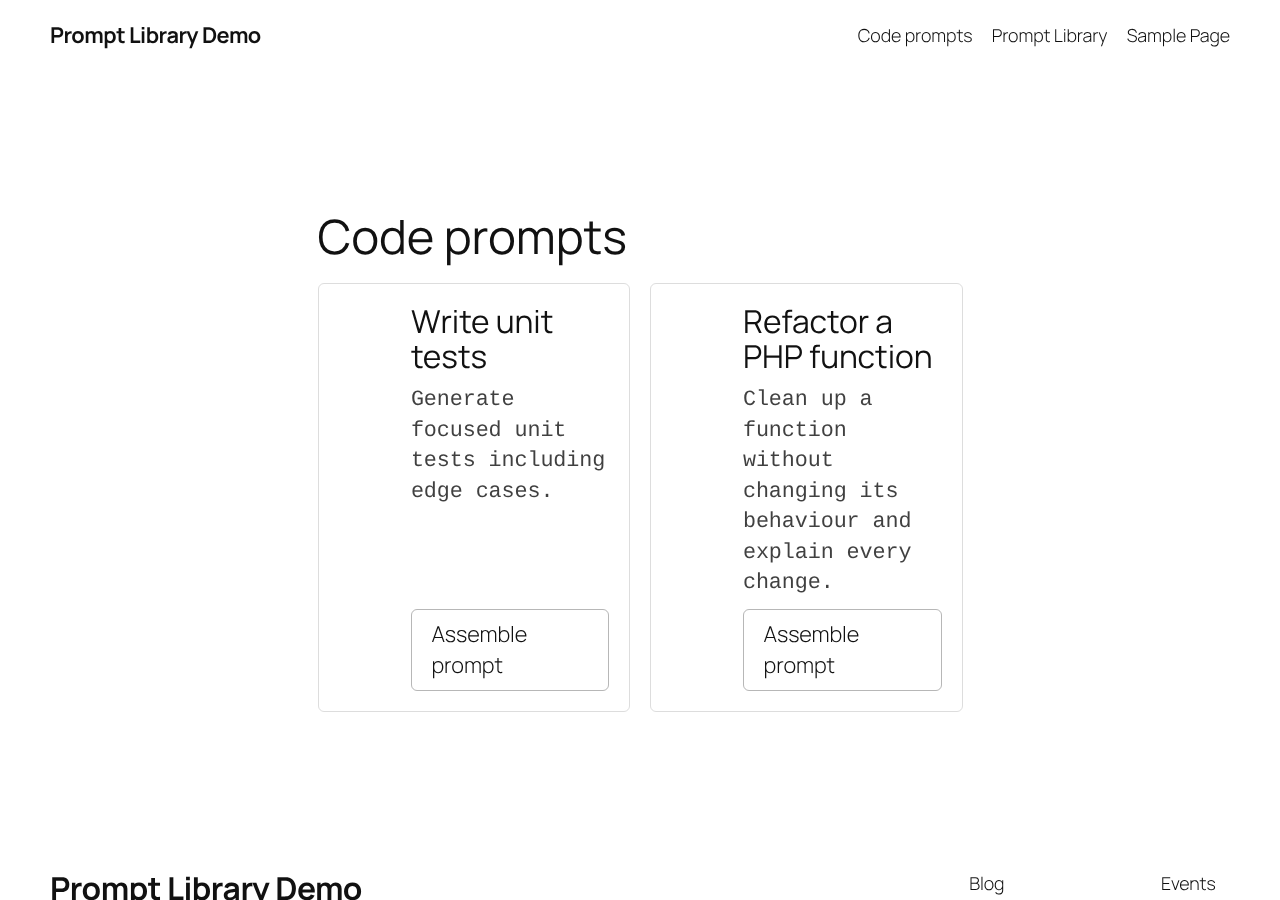
Works in the Classic editor, the Shortcode block, Elementor's Shortcode widget and text widgets:
[apm_prompts kind="" project="" task="" tool="" per_page="12" filters="1"]
| Attribute | Value |
|---|---|
kind | Output slug: text, image or code |
project | Project slug |
task | Use case slug |
tool | AI tool slug |
per_page | Number of prompts, 1–60 (default 12) |
filters | 1 shows the search & filter bar, 0 hides it |
Example – six Code prompts without filters:
[apm_prompts kind="code" per_page="6" filters="0"]
Block & Classic Themes
Block themes (e.g. Twenty Twenty-Five)
The plugin registers its own templates: Single Prompt, Prompt Archive and one archive template per taxonomy. Edit them in Appearance > Editor > Templates > AI Prompt Manager, e.g. to add a sidebar or change the header:
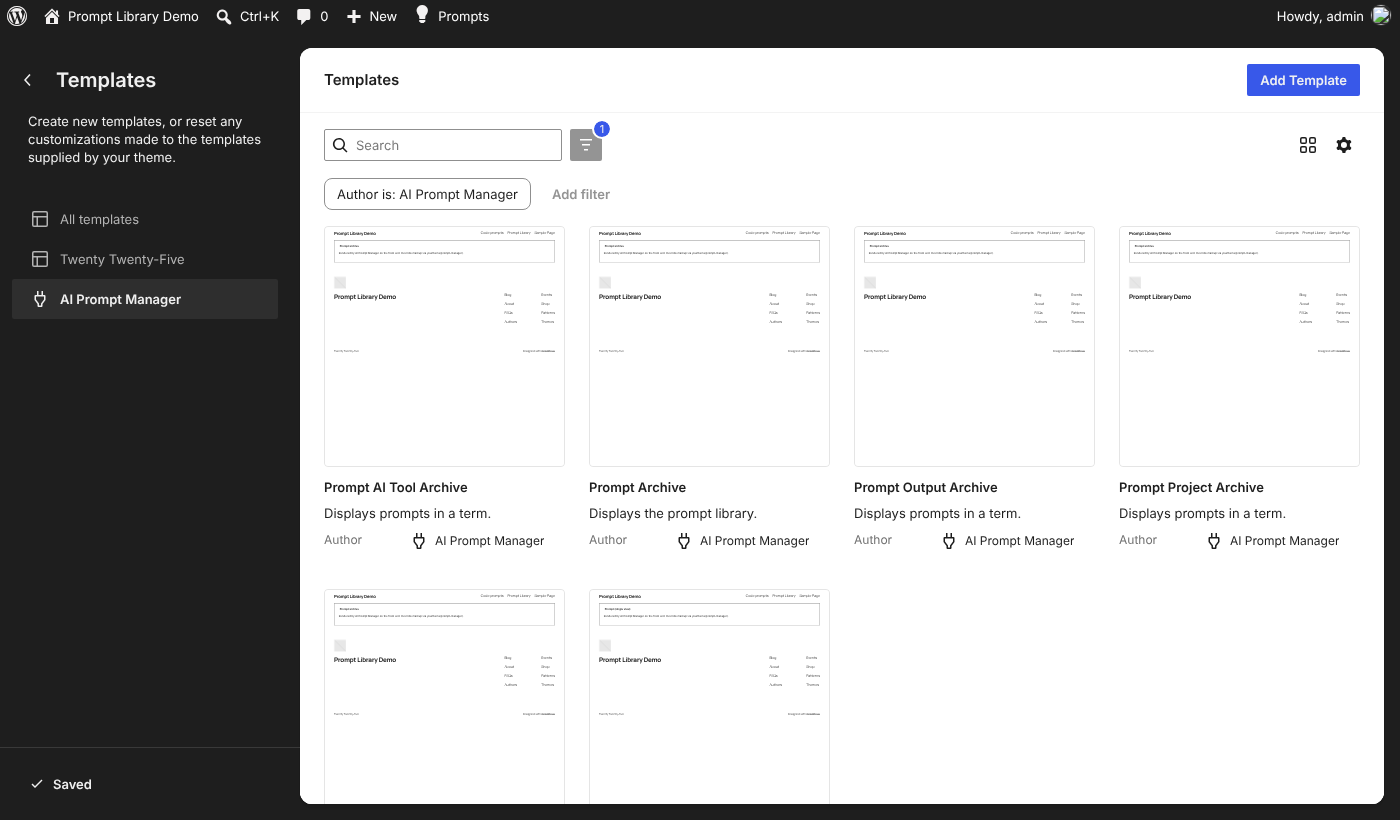
The templates contain the Prompt (single view) and Prompt Archive blocks, which output the prompt and the library. Keep these blocks in the template.
Classic themes
The plugin uses its own page templates automatically. If your theme has its own single-apm_prompt.php, archive-apm_prompt.php or taxonomy-apm_*.php, the theme's files are used instead. To change only the markup, see Template Overrides.
Prompt pages and the library are generated automatically, so they cannot be edited in Gutenberg or Elementor like a normal page. To build a custom landing page, create a normal page and add the Prompt Library block, the shortcode or the widgets.
Custom Widgets
The plugin comes with four widgets. Go to Appearance > Widgets (classic themes) and add them to your sidebar or footer areas. In Elementor you find them in the widget panel under “WordPress”.
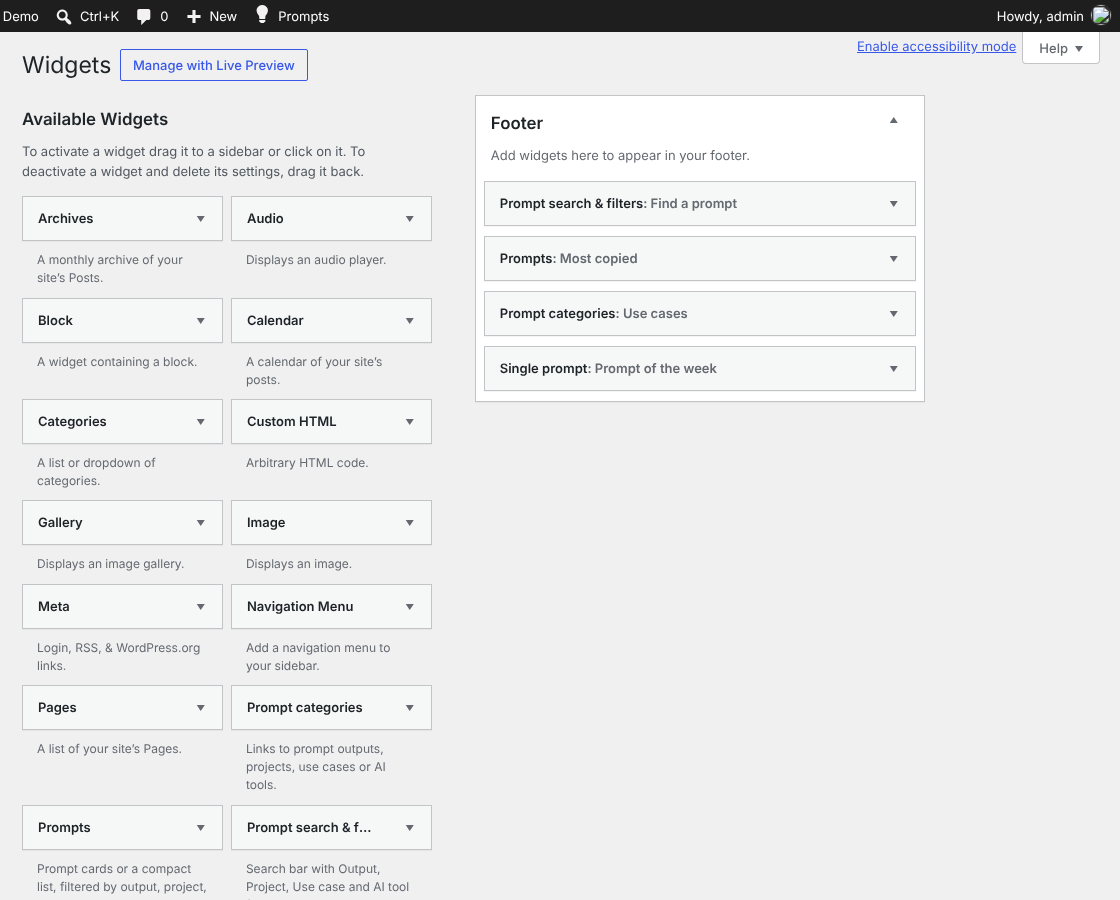
(We are using the 'Classic Widgets' plugin to get this widget screen: https://wordpress.org/plugins/classic-widgets/. With the block widget editor, add them through the “Legacy Widget” block.)
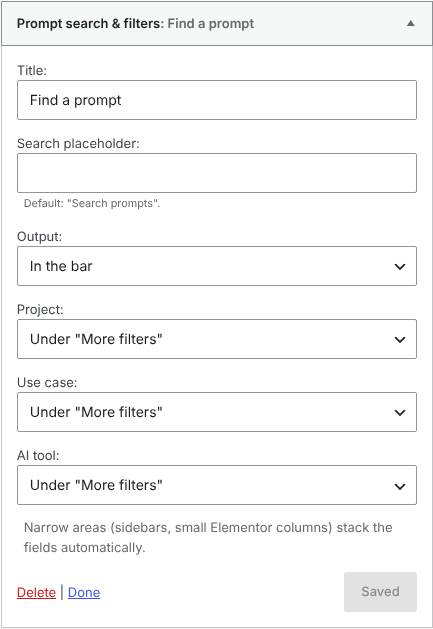
Prompt search & filters
The same search & filter bar as in the library. For each filter choose In the bar, Under “More filters” or Hidden. The search leads to the prompt library.
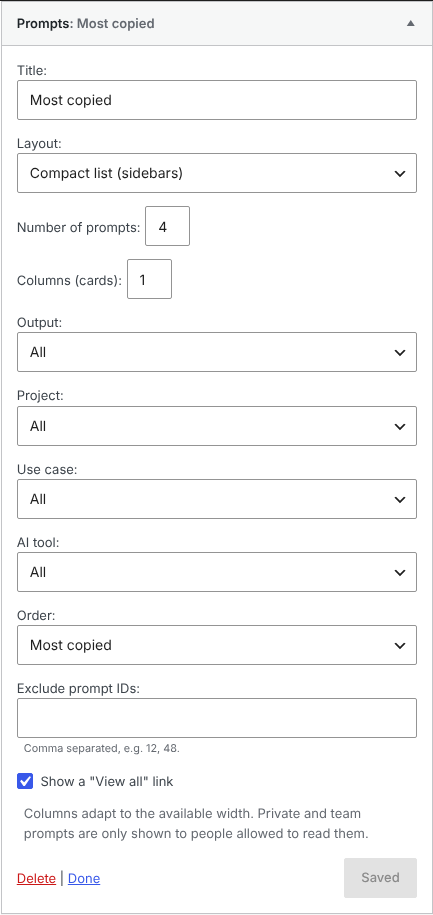
Prompts
Prompt cards or a compact list with Copy buttons.
- Layout: Cards or Compact list (for sidebars),
- Number of prompts: 1–24, Columns (cards): 1–4 (fewer automatically in narrow areas),
- filter by Output, Project, Use case and AI tool,
- Order: Newest first, Recently updated, Title (A–Z) or Most copied (see Usage Statistics),
- Exclude prompt IDs and an optional “View all” link.
On a prompt page the widget never lists the prompt being viewed.
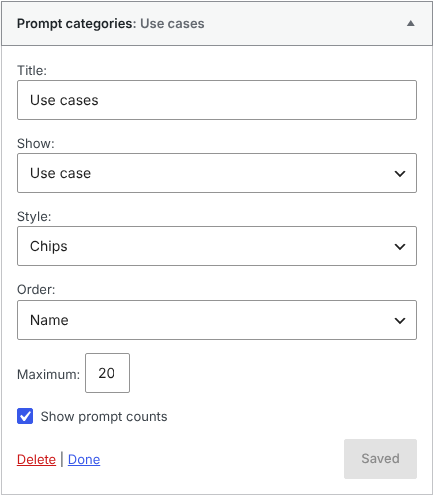
Prompt categories
Links to Outputs, Projects, Use cases or AI tools, as a list or chips, ordered by name or by number of prompts, with optional counts (counts include public prompts only).
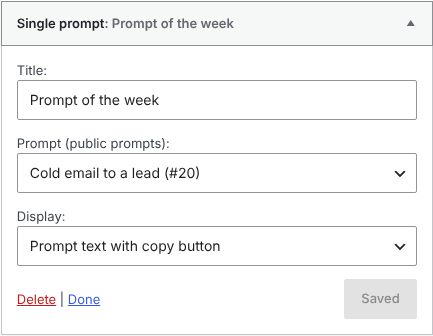
Single prompt
One public prompt (“prompt of the week”) with highlighted variables and a Copy button, or its card.
The four widgets in a footer area (Twenty Twenty-One theme):
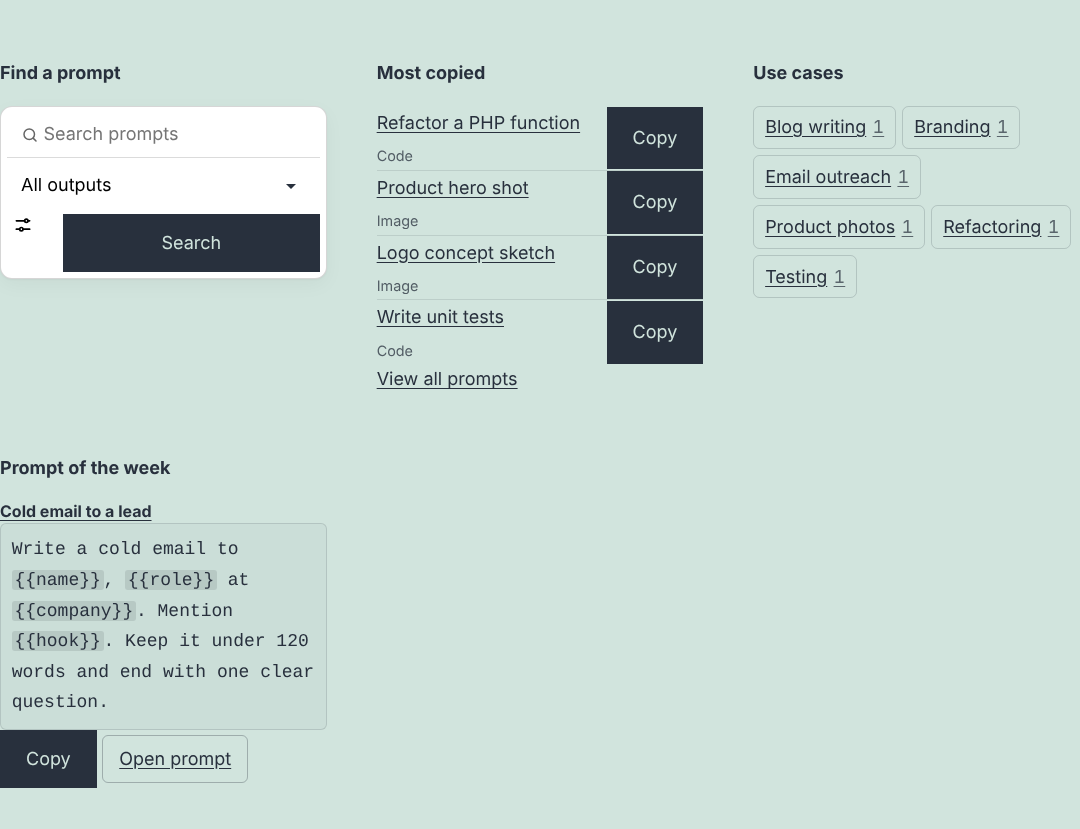
Private and team prompts are only shown to people allowed to read them.
Result Images
Image prompts can show what the prompt produced.
- In Output fields click Select images and choose or upload images in the Media Library (up to 30).
- Drag the thumbnails (or use ← / →) to reorder them. ★ makes an image the featured one and moves it to the first position. The first image is used on cards, in widgets and in structured data.
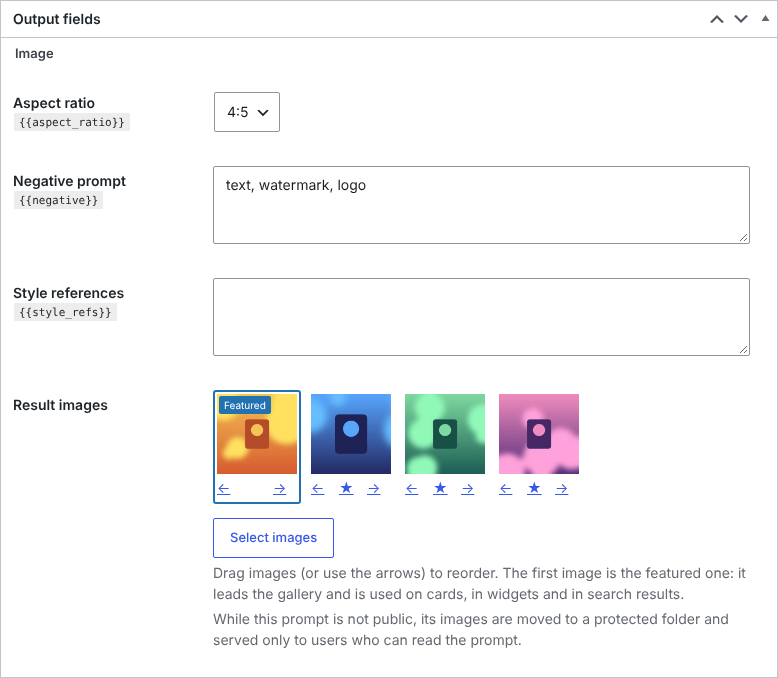
On the prompt page the images are shown in a grid (1 image = full width, 2 images = two columns, 3 or more = three columns):
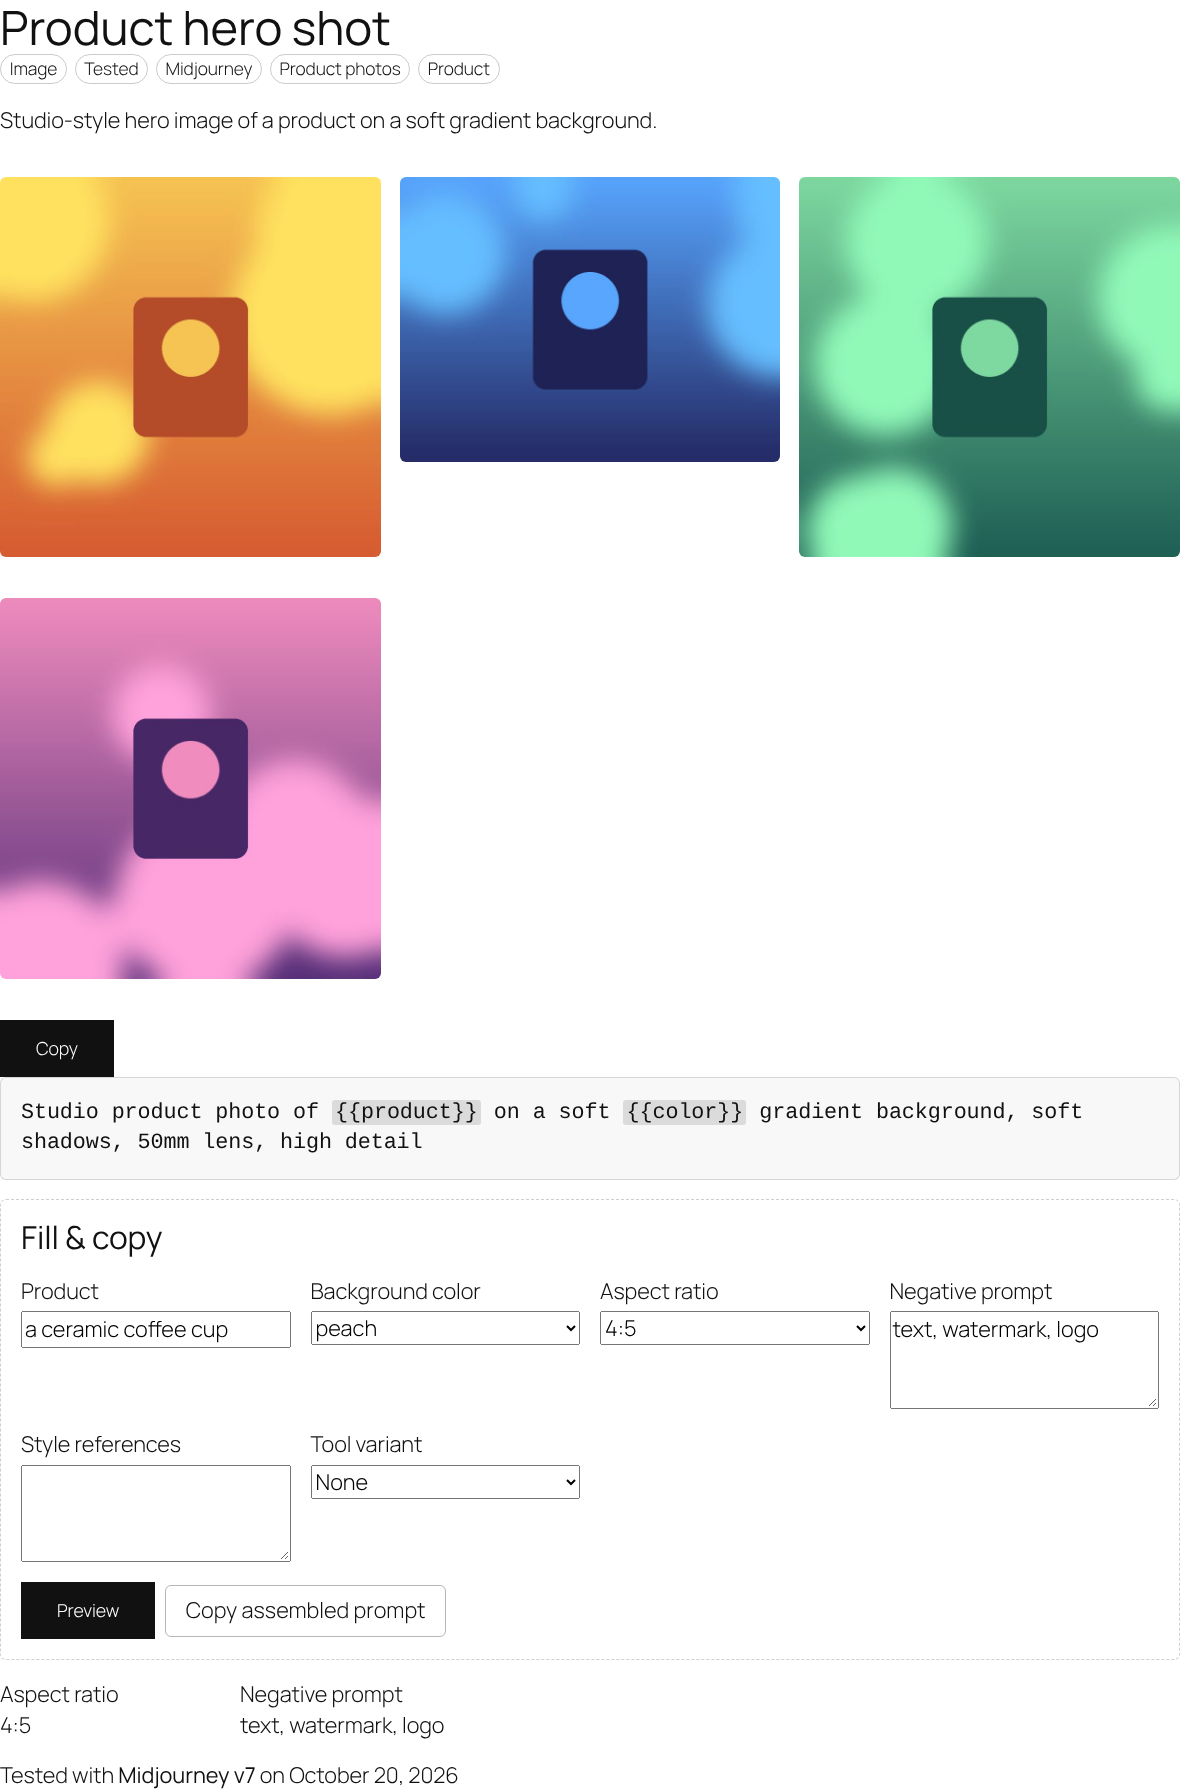
Images and thumbnails are generated by WordPress automatically. Use the “Select images” button (not the main editor) to add result images.
Lightbox
Install and activate the free Lightbox for Gallery & Image Block plugin and result images open in a lightbox with captions. No setup is needed. Without it, a click opens the full-size image.
Protected images
When Protect result images is on (default), images of Private and Team prompts are moved to wp-content/uploads/apm-protected/, renamed with a random name and only served to users who can read the prompt. When the prompt becomes Public they move back.
Nginx and IIS servers ignore the .htaccess file that blocks direct access to that folder. Add this rule to your Nginx config (or ask your host):
location ^~ /wp-content/uploads/apm-protected/ { deny all; }
The Settings page shows a notice when it detects such a server.
Note: an image belongs to the first prompt that uses it. Don't reuse the same image in a public and a private prompt; upload it twice instead.
Usage Statistics
The plugin counts how often each prompt is copied. The total is shown in the Uses column of the prompt list and drives the “Most copied” order of the Prompts widget.
- A use is counted when a logged-in user copies an assembled prompt (“Copy assembled prompt” on the prompt page, or copying from the command palette).
- Not counted: the plain Copy button, Preview and copying from the preview box, and copies by visitors who are not logged in.
- Counts are added up once a day by WP-Cron, so new copies show up the next day.
WP-Cron only runs when your site gets visits. If your host disables WP-Cron (DISABLE_WP_CRON), make sure a real server cron job calls wp-cron.php, otherwise the counts never update.
Developers can also count anonymous copies with the apm_log_anonymous_usage filter – only together with your own rate limiting.
Styling (CSS)
The plugin takes colors and fonts from your theme. Choose how much CSS it adds in Prompts > Settings > Front-end CSS:
- Structural + cosmetic: layout plus subtle borders and backgrounds (derived from the text color, so they work on light and dark themes),
- Structural only: layout, gaps, overflow and states,
- None: your theme styles everything.
CSS is loaded only on prompt pages and on pages that use the block, the shortcode or a widget.
All plugin rules are low-priority (inside @layer apm and :where()), so any rule in your theme or in Appearance > Customize > Additional CSS wins without !important. Buttons use the .wp-element-button class, so block themes style them automatically.
Most sizes can be changed with CSS variables, e.g.:
:root {
  --apm-gap: 1.5rem;     /* space between cards */
  --apm-radius: 12px;    /* corner radius */
  --apm-mono: "JetBrains Mono", monospace;  /* prompt font */
}
Available variables: --apm-col, --apm-gap, --apm-space, --apm-radius, --apm-prompt-max, --apm-prompt-font, --apm-mono, --apm-container, --apm-gutter, --apm-palette-bg, --apm-palette-fg, --apm-hl-*.
Template Overrides
To change the markup, copy a file from the plugin's templates/ folder into a prompt-manager folder in your (child) theme and edit the copy:
wp-content/plugins/ai-prompt-manager/templates/card.php
  → wp-content/themes/your-child-theme/prompt-manager/card.php
| File | What it renders |
|---|---|
single-prompt.php, archive-prompt.php | Page templates (classic themes) |
content-single.php | The prompt page content |
content-archive.php | The library (filters, grid, pagination) |
card.php | One prompt card |
parts/fill-form.php | The Fill & copy form |
parts/filters.php | The search & filter bar |
parts/meta.php | Badges under the title |
parts/palette.php | Command palette shell |
single/kind.php, single/kind-image.php | Output-specific parts of the prompt page (e.g. result images) |
widgets/prompts.php, widgets/terms.php, widgets/prompt.php | Widget output |
Files can be made per output by adding the output slug: card-code.php, content-archive-code.php, single/kind-image.php.
Your copies are not updated with the plugin. After an update, compare them with the new versions (the changelog in README.md lists templates that changed).
Plugins
AI Prompt Manager doesn't need any other plugin. These optional plugins work with it:
Elementor
Use the four prompt widgets from the “WordPress” section of the Elementor panel, or the shortcode in a Shortcode widget. The plugin loads its CSS in the page head when an Elementor page uses one of its widgets.
Lightbox for Gallery & Image Block
Plugin page: Plugin Homepage. Opens result images in a lightbox. No setup needed.
Classic Widgets
Plugin page: Plugin Homepage. Restores the classic widget screen (optional).
WordPress Importer
Plugin page: Plugin Homepage. Moves prompts between sites. See Import / Export.
Import / Export
Prompts, instructions and their terms are exported and imported with the standard WordPress tools.
Export:
- Go to Tools > Export,
- choose All content. Exporting only “Prompts” or “Instructions” works too, but then result images and the instructions attached to prompts are not in the file and are dropped from the imported prompts,
- download the export file.
Import:
- Make sure AI Prompt Manager is active on the target site before importing. Otherwise WordPress skips the prompts.
- Go to Tools > Import > WordPress (install the importer when asked) and upload the file,
- map authors to existing users. Create the users (with the right roles) first – the importer doesn't assign roles.
After the import the plugin automatically reconnects instructions, result images and tool variants and restores each item's visibility.
Public items stay public only if the importing user may publish public prompts (Administrator or Editor). Plugin Settings are not part of the export file – set them again on the new site.
Importing the same file twice doesn't create duplicates of existing items.
Developers
A full technical reference (data model, security model, REST details) is in README.md inside the plugin folder. The essentials:
Hooks
| Hook | Type | Purpose |
|---|---|---|
apm_kinds | filter | Add or change outputs and their fields. |
apm_assembled_parts | filter | Change the parts of an assembled prompt before they are joined. |
apm_prompt_html | filter | Change the rendered prompt HTML (must stay escaped). |
apm_locate_template | filter | Change the resolved template path. |
apm_schema_data | filter | Change the JSON-LD data. |
apm_load_styles | filter | Return false to disable the plugin CSS. |
apm_archive_per_page | filter | Prompts per library page (default 24). |
apm_log_anonymous_usage | filter | Count copies by visitors who aren't logged in. |
apm_live_search | filter | Return false to turn off live search suggestions. |
apm_card_cta_label | filter | Card button text (default “Assemble prompt”). |
apm_lang_abbr | filter | Language abbreviation on code cards (“JavaScript” → “JS”). |
apm_visibility_changed | action | Fires when visibility is set through the API. |
Example – turn off live search and show 12 prompts per library page (child theme functions.php):
add_filter( 'apm_live_search', '__return_false' );
add_filter( 'apm_archive_per_page', function () { return 12; } );
PHP functions
apm_assemble(), apm_get_kind(), apm_get_visibility(), apm_set_visibility(), apm_render_prompt(), apm_locate_template(), apm_get_template_part().
Prompts created with wp_insert_post() are Private until you call apm_set_visibility( $post_id, 'public' ) (or 'team').
REST API (/wp-json/apm/v1/)
| Route | Purpose |
|---|---|
GET prompts | List prompts. Parameters: search, kind, project, task, tool, page, per_page (max 50), lite. |
GET prompts/{id} | Prompt text, variables, tools and instruction groups. |
POST prompts/{id}/assemble | Assemble a prompt. Body: snippets, tool, values, input_code, dry_run. |
Only prompts the current user may read are returned. Authentication: cookie + X-WP-Nonce, or Application Passwords for external tools. Prompts and instructions are not available through the core /wp/v2/ routes.
Translation
The plugin is translation ready (text domain ai-prompt-manager). Version 1.6.0 doesn't include a .pot file yet, so create one first.
Easiest way: Loco Translate
- Install the free Loco Translate plugin,
- go to Loco Translate > Plugins > AI Prompt Manager,
- create a template (POT) when asked, then New language and translate the strings,
- save to the System location (
wp-content/languages/plugins/) so updates don't overwrite your translation.
With WP-CLI and Poedit
- Generate the template in the plugin folder:
wp i18n make-pot . languages/ai-prompt-manager.pot
- Translate it in Poedit,
- save the files as
ai-prompt-manager-de_DE.po/.mo(use your locale; the file name is crucial, see language codes and country codes), - upload them to
wp-content/languages/plugins/.
Your site language (Settings > General > Site Language) must match the translation.
Uninstall
- Deactivating the plugin stops the daily usage job. Nothing is deleted.
- Deleting the plugin removes its settings, the usage table, the Prompt Member role and the plugin's capabilities. Your prompts, instructions and terms are kept.
- To remove all content too, enable Delete all prompts, instructions and terms when the plugin is uninstalled in Prompts > Settings before deleting the plugin.
Deleted content cannot be restored. Export your prompts first (Tools > Export). Users who had the Prompt Member role are left without a role; assign them a new one in Users.
FAQ & Known Limitations
The library or a prompt shows “Page not found”.
Go to Settings > Permalinks and hit Save Changes.
Visitors don't see my prompt.
Check that the prompt is Published and its Visibility is Public. A Prompt Member can't make prompts public – an Editor or Administrator has to.
Visitors don't get an instruction.
Only Public instructions reach visitors. Image prompts never use instructions.
The “Uses” column stays at 0.
See Usage Statistics: only assembled copies by logged-in users are counted, once a day.
The command palette doesn't open on my site.
It is off on the front end by default. Enable it in Prompts > Settings.
Known limitations
- Quick Edit and Bulk Edit are not available for prompts and instructions.
- Each result image belongs to one prompt (the first prompt that uses it decides whether it is protected).
- The Prompt Library block preview in the block editor is unstyled.
- Not tested yet: multisite, persistent object caches, page-cache plugins, RTL languages, Yoast and Rank Math sitemaps (the WordPress core sitemap was tested).
Once again, thank you so much for purchasing this plugin.