Dannci has been building and selling WordPress themes since 2008. He knows classic theme architecture inside out; PHP templates, the Customizer, widget areas, all of it. This article comes from the middle of his own shift to block themes: the first FSE theme he’s currently developing for Themnific. If the learning curve feels steep, he’s on it right now too.
You’re Not Broken, You’re Just in a New Place
The first time most people activate a block theme, they spend a few minutes clicking around the dashboard and then wonder if they broke something. The Customizer is gone. The widget screen has changed or disappeared. The menu looks different. Nothing looks obviously wrong, but nothing looks familiar either.
This is a common reaction. It does not mean you made a mistake or picked the wrong theme. Block themes work on a fundamentally different layer than classic themes, and the WordPress interface reflects that in ways that take adjustment.
Classic themes handed you a Customizer panel with specific controls: upload your logo here, pick your colors there, configure your menu in this box. Block themes replace that system with the Site Editor, a visual editing environment where you work directly inside your site’s structure rather than through a separate settings panel. The controls are more flexible, but they are also less obvious when you first land on them.
This article walks you through the first hour. It follows a specific order because sequence matters here: doing things out of order costs you time.
What Actually Changed When You Activated the Theme
Your content is intact. Posts, pages, images, and any other media you had before switching themes are unaffected. Block themes do not touch the content stored in your database.
What changed is the template layer: the HTML structure that wraps your content. Your header, footer, page layout, and the arrangement of elements around your posts are now controlled by the theme’s template files, which you can edit directly inside the Site Editor. With a classic theme, you could only adjust what the Customizer exposed. With a block theme, you can edit the full structure of any template.
Widget areas work differently depending on your setup. If your previous theme used classic widgets and your block theme does not include a traditional sidebar, those widget areas may no longer appear. Anything you had in those areas is not deleted, but it is no longer displayed until you add it back inside a template or template part. Some block themes include block-based widget areas; others handle sidebars entirely through templates.
The Site Editor is now the central tool for anything structural on your site. Colors, typography, header layout, footer content, and page templates all live there.
A Map of the Site Editor Before You Touch Anything
Open the Site Editor from your WordPress dashboard (Appearance > Editor). Before editing anything, get oriented. The left sidebar gives you access to four main areas:
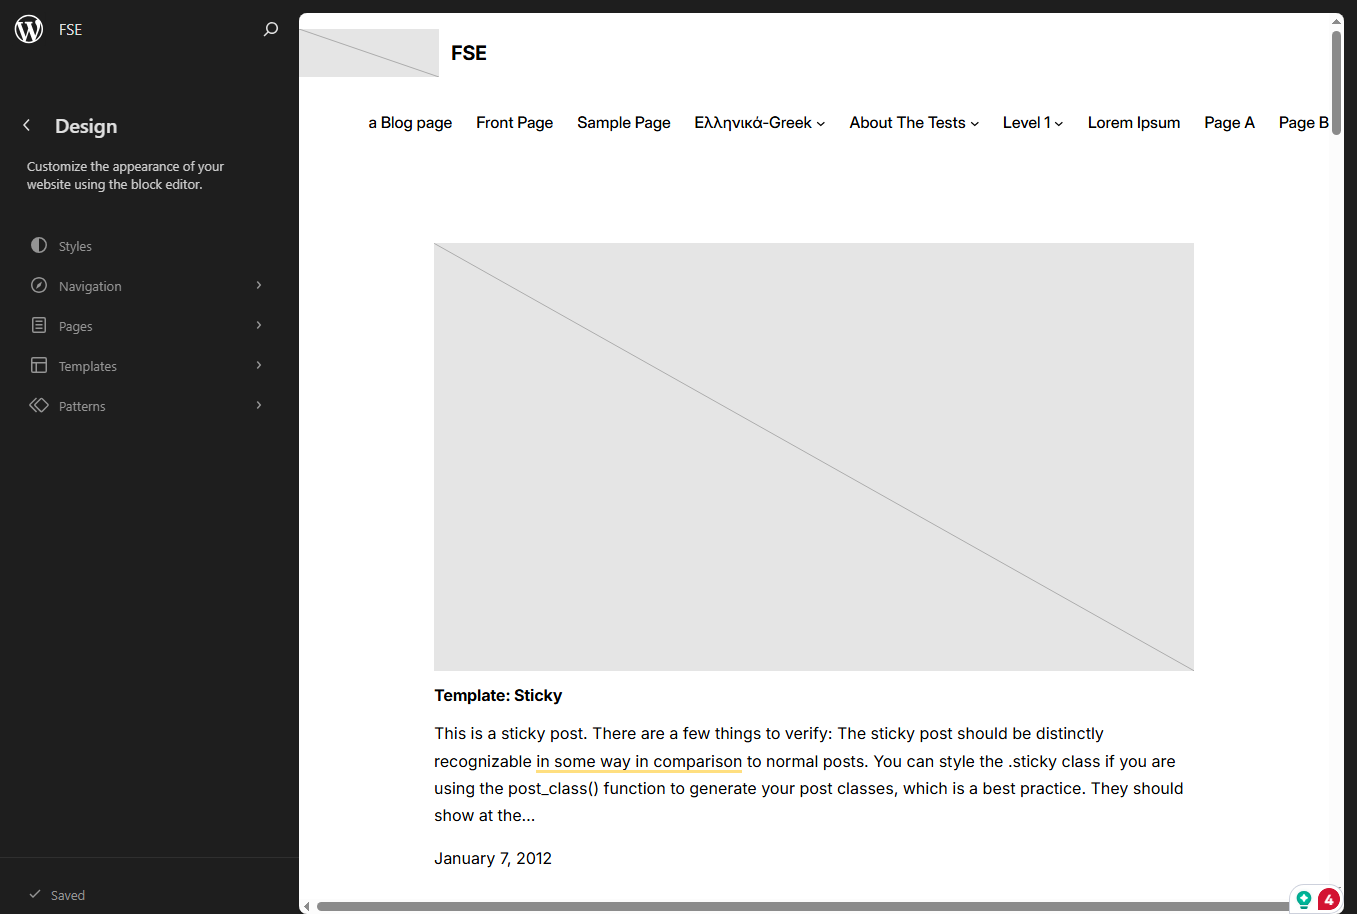
- Templates control the structure of each type of page on your site: your homepage, single posts, category archives, and so on.
- Template Parts are sections that appear across multiple templates, most often your header and footer.
- Patterns are reusable block groups, either from the theme or from the WordPress pattern library.
- Styles is where global colors, fonts, and spacing live. Changes here apply across your entire site.
The UI is still maturing. Some options are buried, labels are not always intuitive, and you will occasionally click something and not immediately understand what it changed. That is not you misusing the tool. It reflects the current state of the editor as WordPress continues to develop it.
You can explore the official WordPress.org documentation for the Site Editor here: WordPress.org Site Editor documentation.
Step 1: Set Your Global Styles First
Before editing any template or template part, set your global styles. This matters because style changes cascade down through your entire site. If you customize a template first and then change your global font, you may find that parts of the template you already edited do not update the way you expect.
Inside the Site Editor, open Styles from the left sidebar (or click the half-circle icon in the top-right corner of the editor). From there you can set:
- Colors: your site’s color palette, including background, text, and link colors
- Typography: your base font family and sizes for headings and body text
- Spacing: default padding and margin values that templates inherit
Many block themes also ship style variations, which are preset combinations of colors and fonts. You can find these inside the Styles panel, often under a “Browse styles” option. Try a variation before committing to manual adjustments. A variation applies globally and gives you a coherent starting point rather than a blank canvas you have to build from scratch. If you switch to one and do not like it, you can switch again or reset to the theme’s default.
The order matters: styles first, templates second. Everything else follows from there.
Step 2: Edit Your Header and Footer
Your header and footer are template parts, not full templates. To edit them, open the Site Editor, go to Patterns > All Template Parts in the left panel, and select either Header or Footer. This opens them in the block editor.
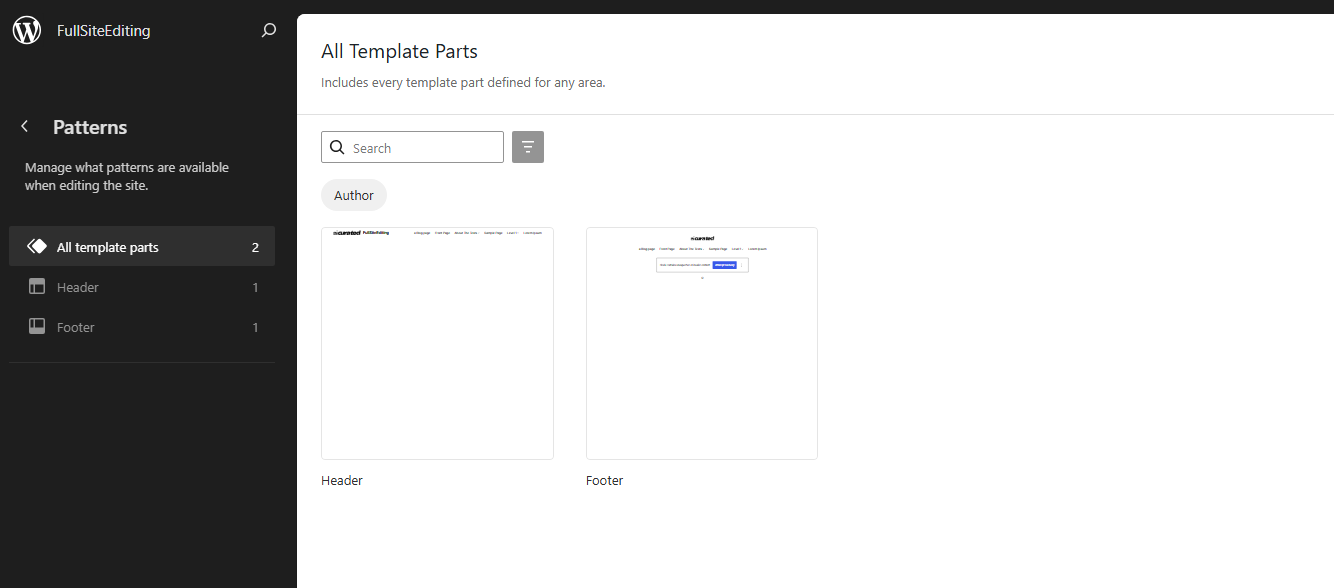
The most common first mistake is clicking into a page template and trying to edit the header from there. You can technically select blocks in the header while viewing a template, but saving those changes works differently depending on whether the header is a synced template part or a synced pattern. To avoid confusion, open the header directly from the Patterns > All Template Parts list.
Inside the header, you can add and remove blocks the same way you would on any page. To replace the logo, select the Site Logo block and upload your image. To edit navigation, select the Navigation block and add, remove, or reorder menu items inside it.
One gotcha: if the theme uses a synced pattern inside the header template part, you are editing the pattern, not just the template part. A synced pattern is shared across wherever that pattern is used. Editing it changes it everywhere. The editor should indicate this, but it is easy to miss. If you see a “Detach” option when you click a block group inside the header, you are likely inside a synced pattern.
After saving your header or footer, check the change on the live site, not just in the editor preview.
Step 3: Review Your Page Templates
Templates control the structure of each page type, not the content inside them. Your homepage template determines whether the page has a full-width layout or a boxed one, whether the title appears at the top or is hidden, and how the content column sits relative to any sidebar. The actual text and images on the page come from the page’s own content, not the template.
To check which template a specific page is using, open that page in the block editor (Pages > All Pages > Edit). In the right-hand sidebar, look for the Template panel under Page settings. It shows the current template and gives you a dropdown to assign a different one.
Most pages use the default page template, which works fine for standard content pages. You only need to customize a template when the default structure does not fit a specific page’s purpose: a landing page with no header, a full-width showcase page, or a custom layout for a specific section of your site.
The distinction to keep in mind: editing a template changes the structure for every page that uses that template. Editing the page’s content only changes that one page. These are separate operations.
Step 4: Use Patterns to Build Pages
Patterns are pre-built groups of blocks that you insert into a page or template. They are different from individual blocks: a pattern might combine a heading, a paragraph, an image, and a button into a ready-made section layout.
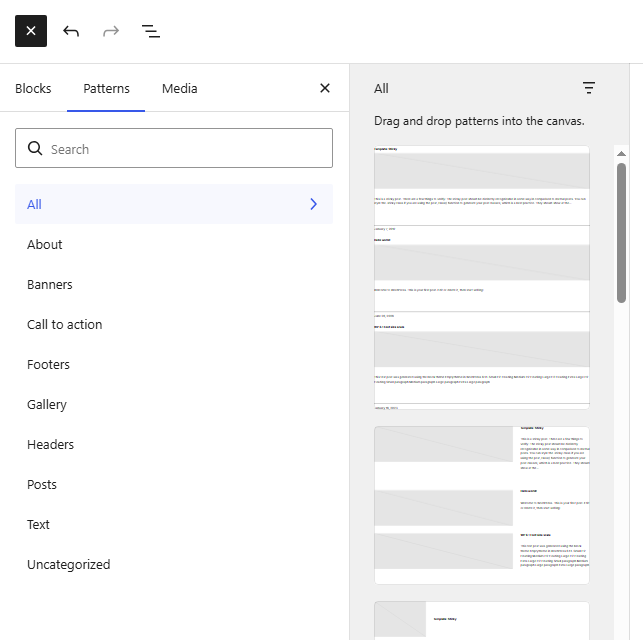
To insert a pattern, open any page or template in the editor, click the block inserter (the + icon), and switch to the Patterns tab. Patterns from the active theme appear there. Select one and it drops into the page.
The practical difference between synced and unsynced patterns comes down to whether you want a change in one place to affect all other places that use the same pattern. Use a synced pattern for something like a call-to-action block that appears in multiple places and needs to stay consistent. Use an unsynced pattern (or convert a synced one to unsynced by detaching it) when you want a starting point that you will then customize per page without affecting anything else.
The theme’s built-in patterns are a starting point, not the full library. The WordPress Pattern Directory at wordpress.org contains free, community-contributed patterns that work with any block theme. You can browse by category and copy patterns directly into your editor.
What Not to Touch Yet, and Why
theme.json is a configuration file that sets the foundational rules for your theme: which colors are available in the editor, what spacing values the theme supports, which blocks have which default settings. You can edit it, but every change has downstream effects that are not always visible until something stops behaving the way you expect. Leave theme.json alone until you have spent real time in the Site Editor and understand which settings live there versus in the Styles panel.
Restructuring the template hierarchy is also something to leave alone initially. The template hierarchy is the system WordPress uses to decide which template to load for each URL on your site. The defaults cover all standard cases. Rearranging or deleting templates before you understand how they connect can leave some pages without a usable layout.
A child theme becomes necessary when you want to make edits that survive theme updates. If you plan to make direct file changes (to theme.json, for example, or to PHP files), do that in a child theme. If you are working entirely inside the Site Editor, your changes are stored in the database and are not overwritten by theme updates, so a child theme is not immediately required. But once you go outside the Site Editor, you need one.
Known Rough Edges in the Site Editor
The Site Editor in WordPress 6.x is functional but not finished. These are documented limitations you will likely encounter:
- Undo/redo behavior is inconsistent. In some versions, undoing a change inside a template part does not work the same way as undoing a change on a regular page. Save frequently and deliberately.
- Some third-party plugins assume a classic theme structure and inject content (banners, sidebars, custom fields) in ways that do not map cleanly to block templates. If a plugin’s output looks broken after switching themes, this is usually why.
- The mobile preview inside the Site Editor does not always match what users see on actual mobile devices. Treat it as a rough check, then verify on the live front-end.
- Template revision history exists but is not prominent. You can access it through the template editor’s options menu. If you make a change that breaks a template layout, revision history is how you roll it back.
For current status on any of these issues, the WordPress Make blog publishes release notes and ongoing development updates organized by component.
Your First 30 Minutes: Practical Checklist
Work through these in order. Each one builds on the previous.
- Set global colors and fonts in the Styles panel ✓
- Check style variations and pick one if the theme ships them ✓
- Edit header: replace logo, configure navigation ✓
- Edit footer: update links and copyright text ✓
- Review homepage template structure ✓
- Check one interior page template (single post or standard page) ✓
- Preview the live front-end on a real mobile device ✓
Where to Go From Here
The Site Editor has more depth than one article can cover. Here’s where to go depending on what you want to tackle next.
If FSE still feels conceptually unclear — step back to the first article in this series, WordPress Block Themes: What Site Owners Need to Know About FSE, which covers the difference between classic and block themes, what theme.json is, and how the template system is structured. It’s worth reading before you go deeper into customization.
If you want to control your theme’s colors, fonts, and spacing at a deeper level: the next article in this series covers theme.json basics: what the file does, which properties are safe to edit, and how changes there cascade through the entire site. That’s where most of the real customization happens once you’re past the initial setup.
For the full technical reference: the WordPress Full Site Editing documentation on WordPress.org covers the Site Editor in detail, including template hierarchy, block locking, and style revisions. It’s the authoritative source and worth bookmarking.
Dannci has been building and selling WordPress themes since 2008. He knows classic theme architecture inside out; PHP templates, the Customizer, widget areas, all of it. This article comes from the middle of his own shift to block themes: the first FSE theme he’s currently developing for Themnific. If the learning curve feels steep, he’s on it right now too.
Last-Updated Date: 29 June 2026
Last modified: